
Dev Blog #50
Hello, comrades!
In today’s 50th anniversary Dev Blog issue, we decided to show you the cockpit of another star of our new simulator — the American F-86A Sabre fighter jet — and tell you all about it in detail, including some interesting historical facts. As the latest aircraft to be used by the U.S. at the time, it has the most modern and technically complex cockpit, making it an extremely fascinating and informative subject to explore.
In today’s 50th anniversary Dev Blog issue, we decided to show you the cockpit of another star of our new simulator — the American F-86A Sabre fighter jet — and tell you all about it in detail, including some interesting historical facts. As the latest aircraft to be used by the U.S. at the time, it has the most modern and technically complex cockpit, making it an extremely fascinating and informative subject to explore.
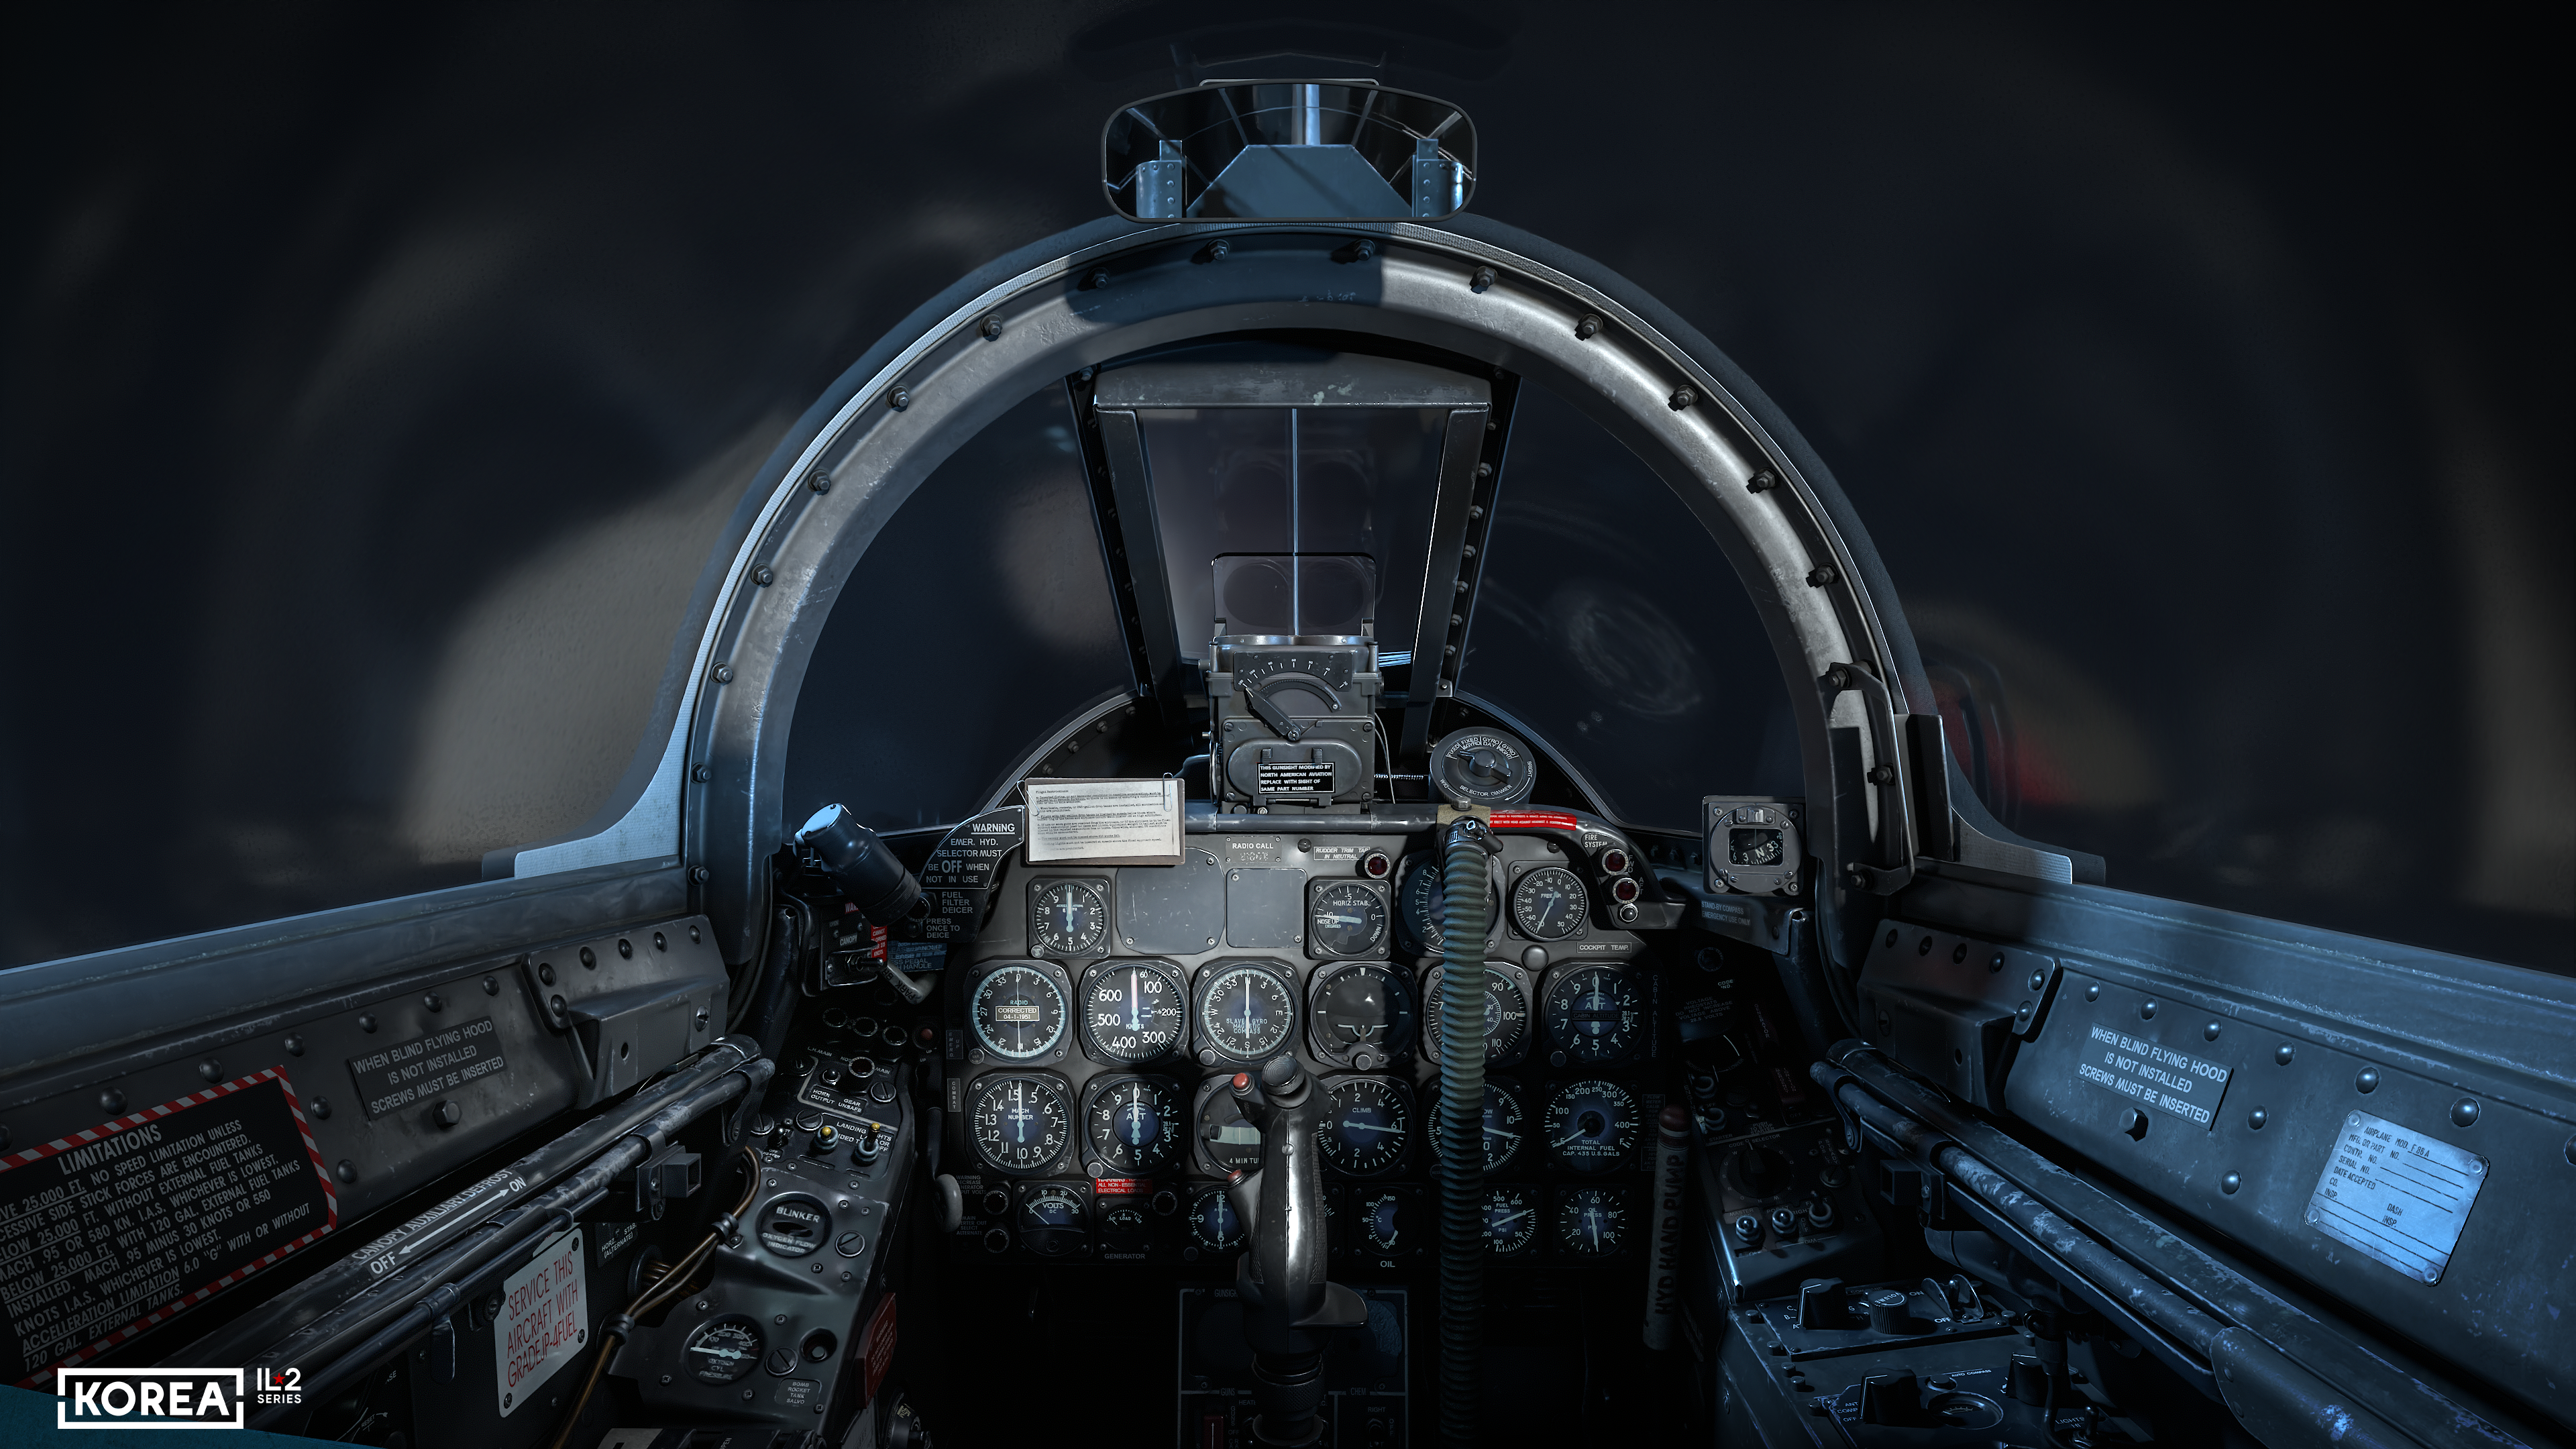
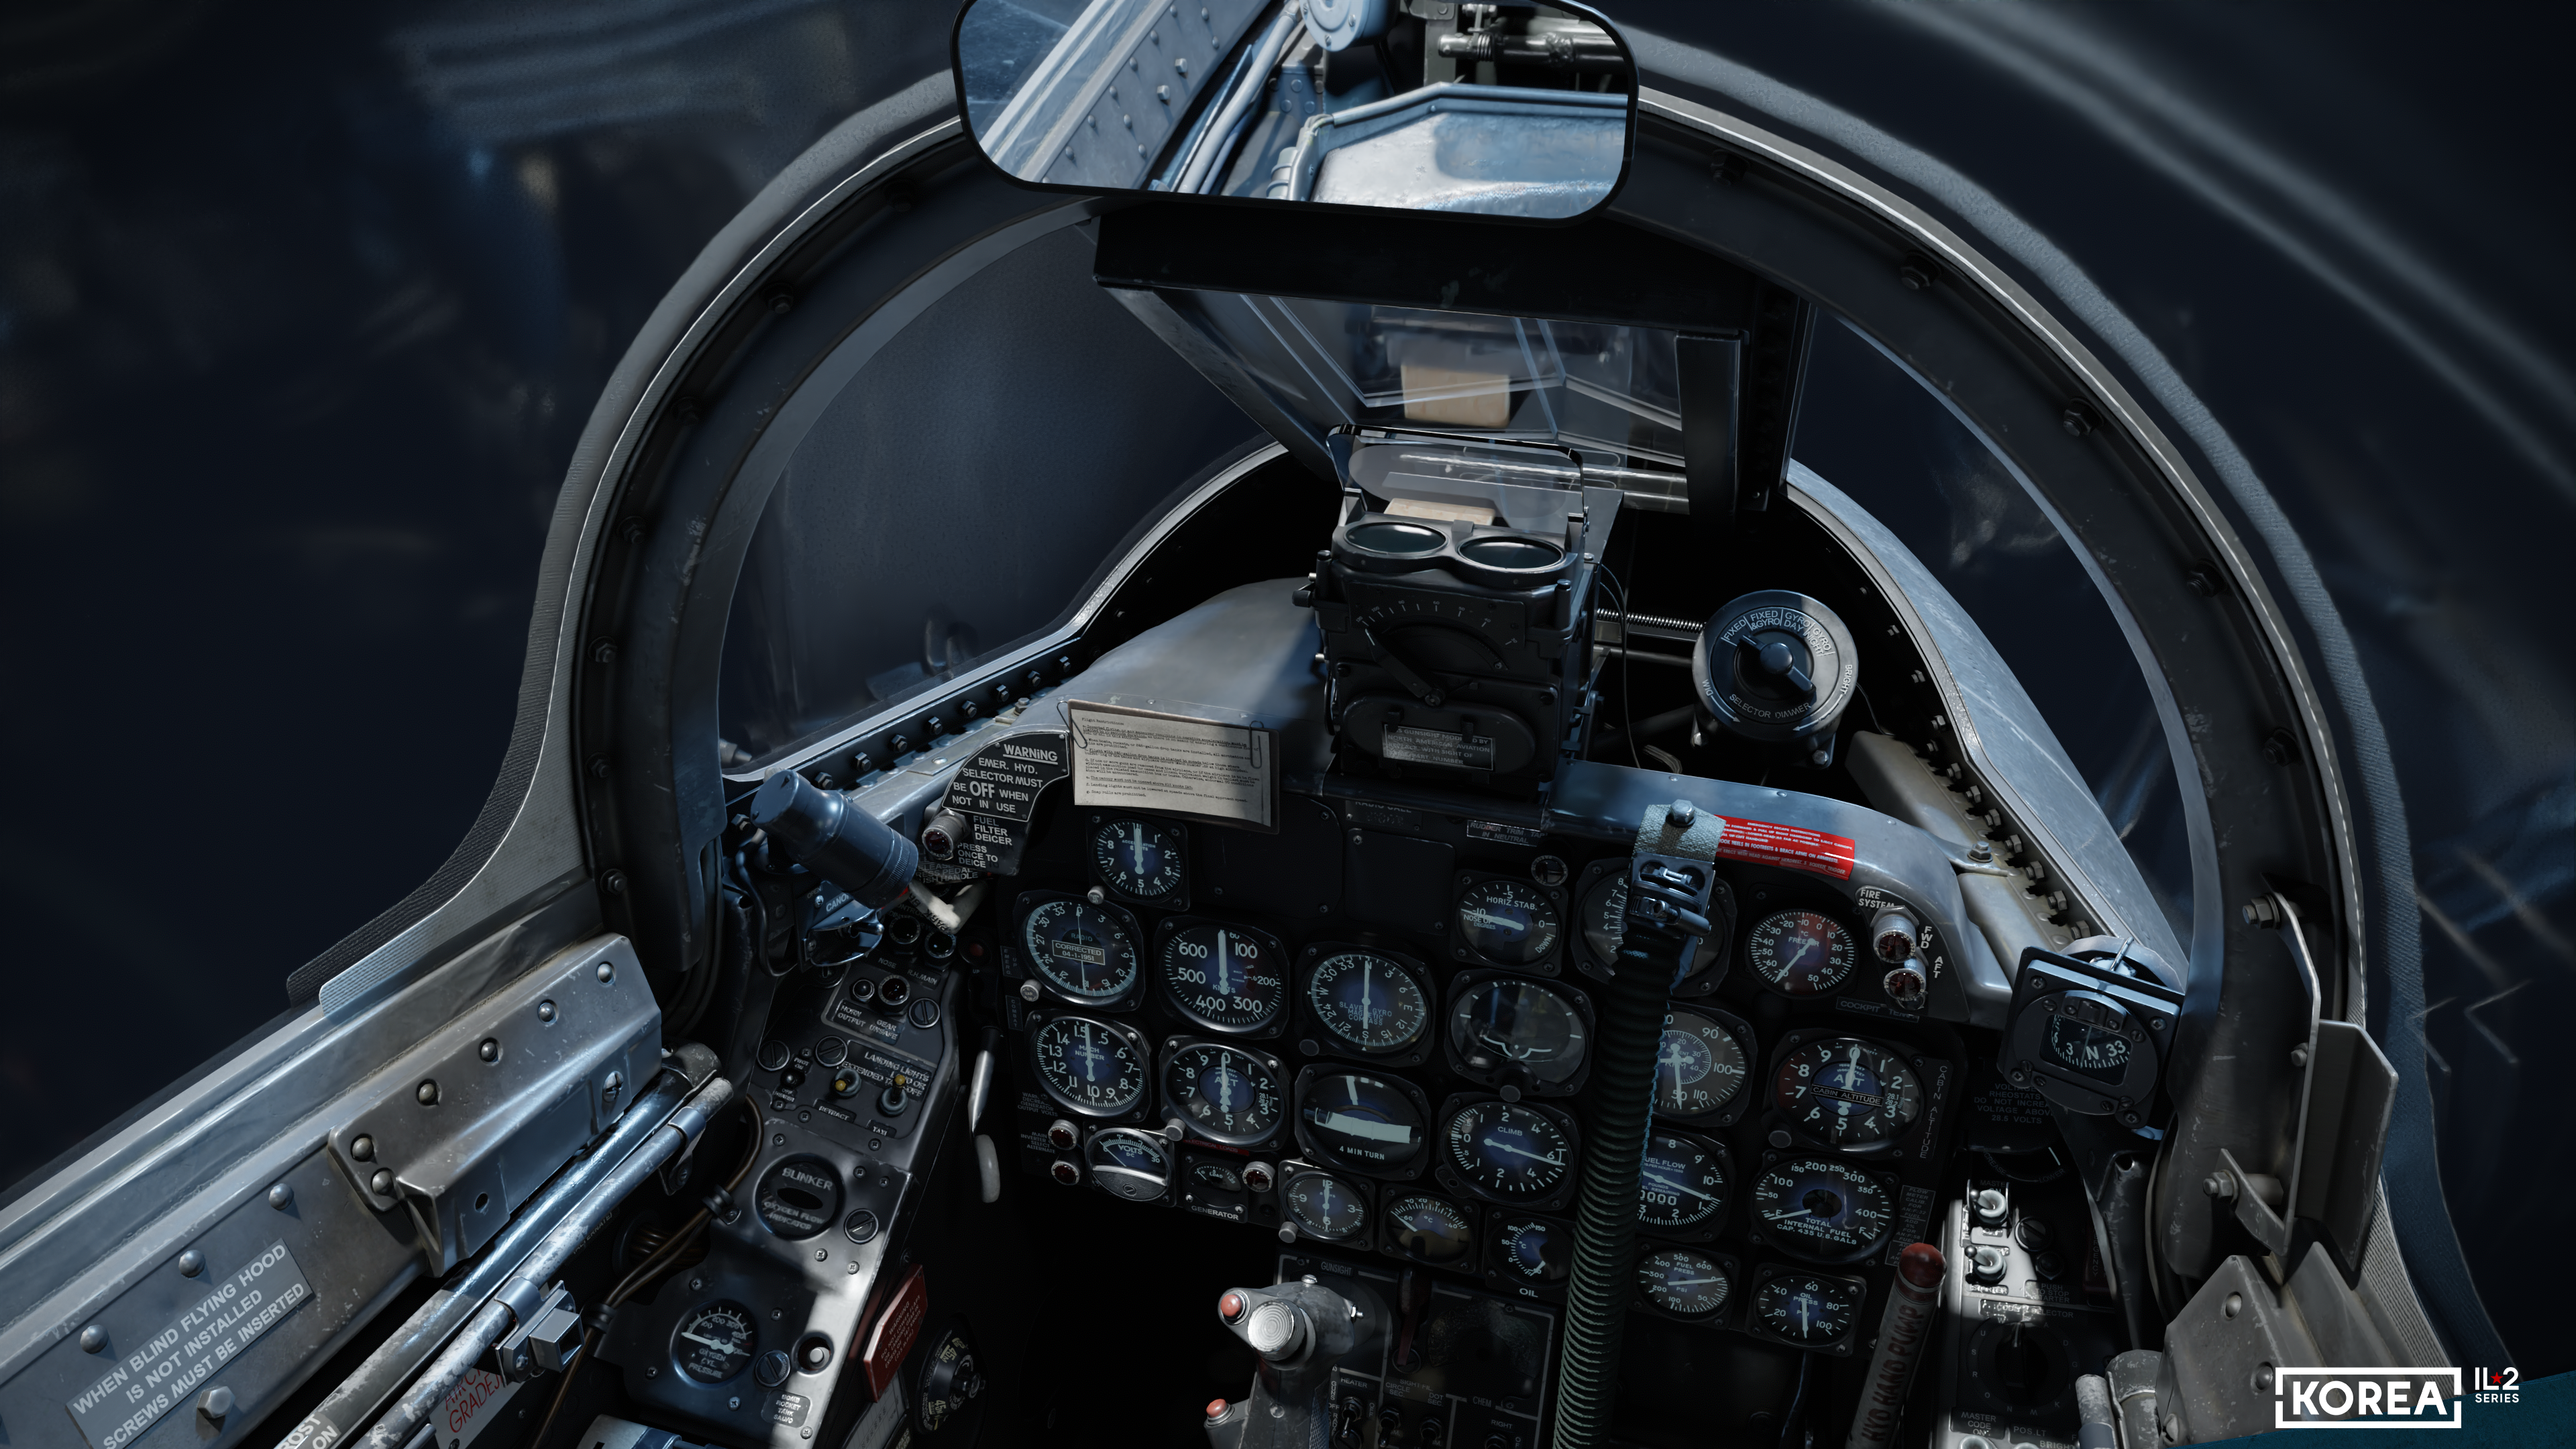
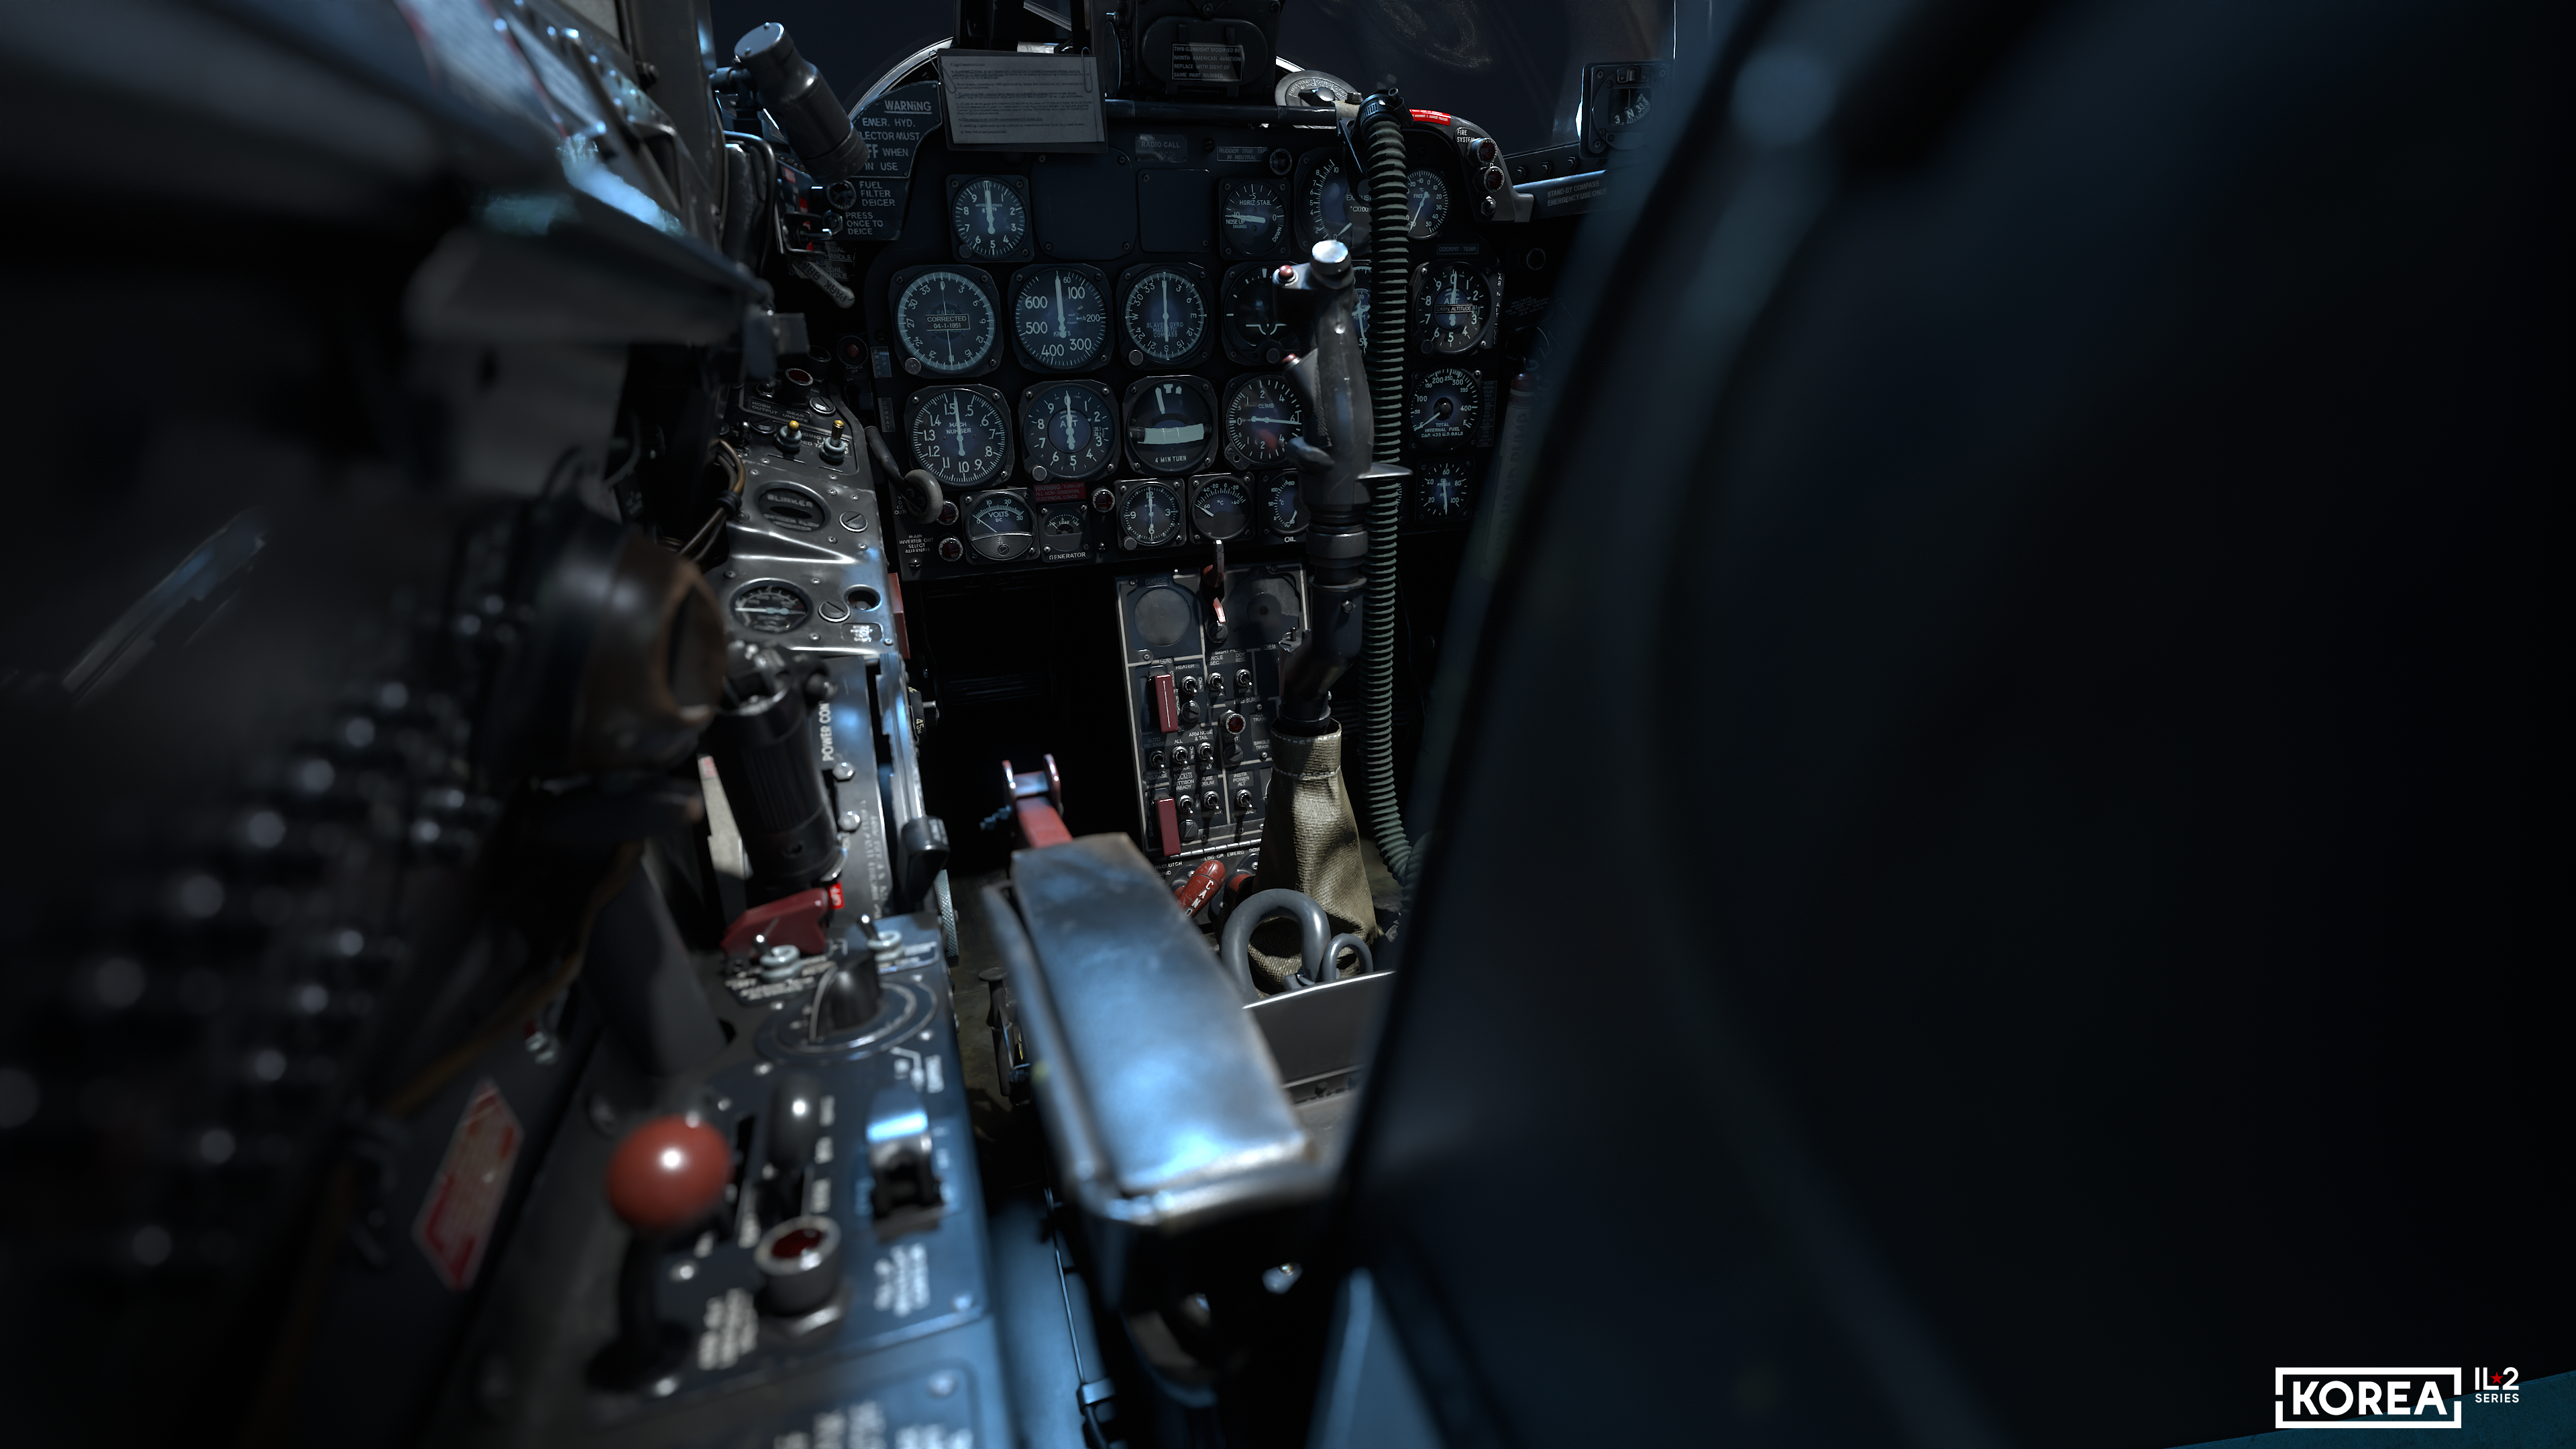
Let’s start with what we see above the instrument panel. For the Korea. Il2 Series sim, we chose a later version of the cockpit, which retains the early Mark 18 gyroscopic sight, proven in combat during World War II. This combination was actually used in the Korean War because the standard A-1 sight proved to be highly unreliable in combat conditions. Nevertheless, as a modification, we plan to add the option of installing its improved version, the A-1CM, in conjunction with the AN/APG-30 radar rangefinder.
This is also a historically accurate option: an F-86A equipped with this sight was shot down by the Soviet pilot Yevgeny Pepelyaev in October 1951. A MiG-15 shell hit the fuselage, causing the ejection system to fail, but Captain Bill Garrett demonstrated his high-class piloting skills and managed to make a belly landing on the coast. The pilot was evacuated, and, for obvious reasons, attempts were made to bomb the aircraft so that it would not be captured. However, the sea tide hid it, allowing the Soviet side to extract the plane from the combat zone and deliver it to the USSR for study of its design and equipment. All in all, this particular Sabre, tail number 49−1319, had a really eventful fate: before that, American ace pilot James Jabara had managed to shoot down two MiG-15s piloting it. By the way, the 334th Fighter-Interceptor Squadron of the 4th Fighter-Interceptor Wing, which at that time Bill Garrett and this F-86A were part of, will of course be in our Commander’s Career mode.
But it seems we have digressed — let’s continue our review of the cockpit, listing the instruments from left to right and top to bottom.
But it seems we have digressed — let’s continue our review of the cockpit, listing the instruments from left to right and top to bottom.
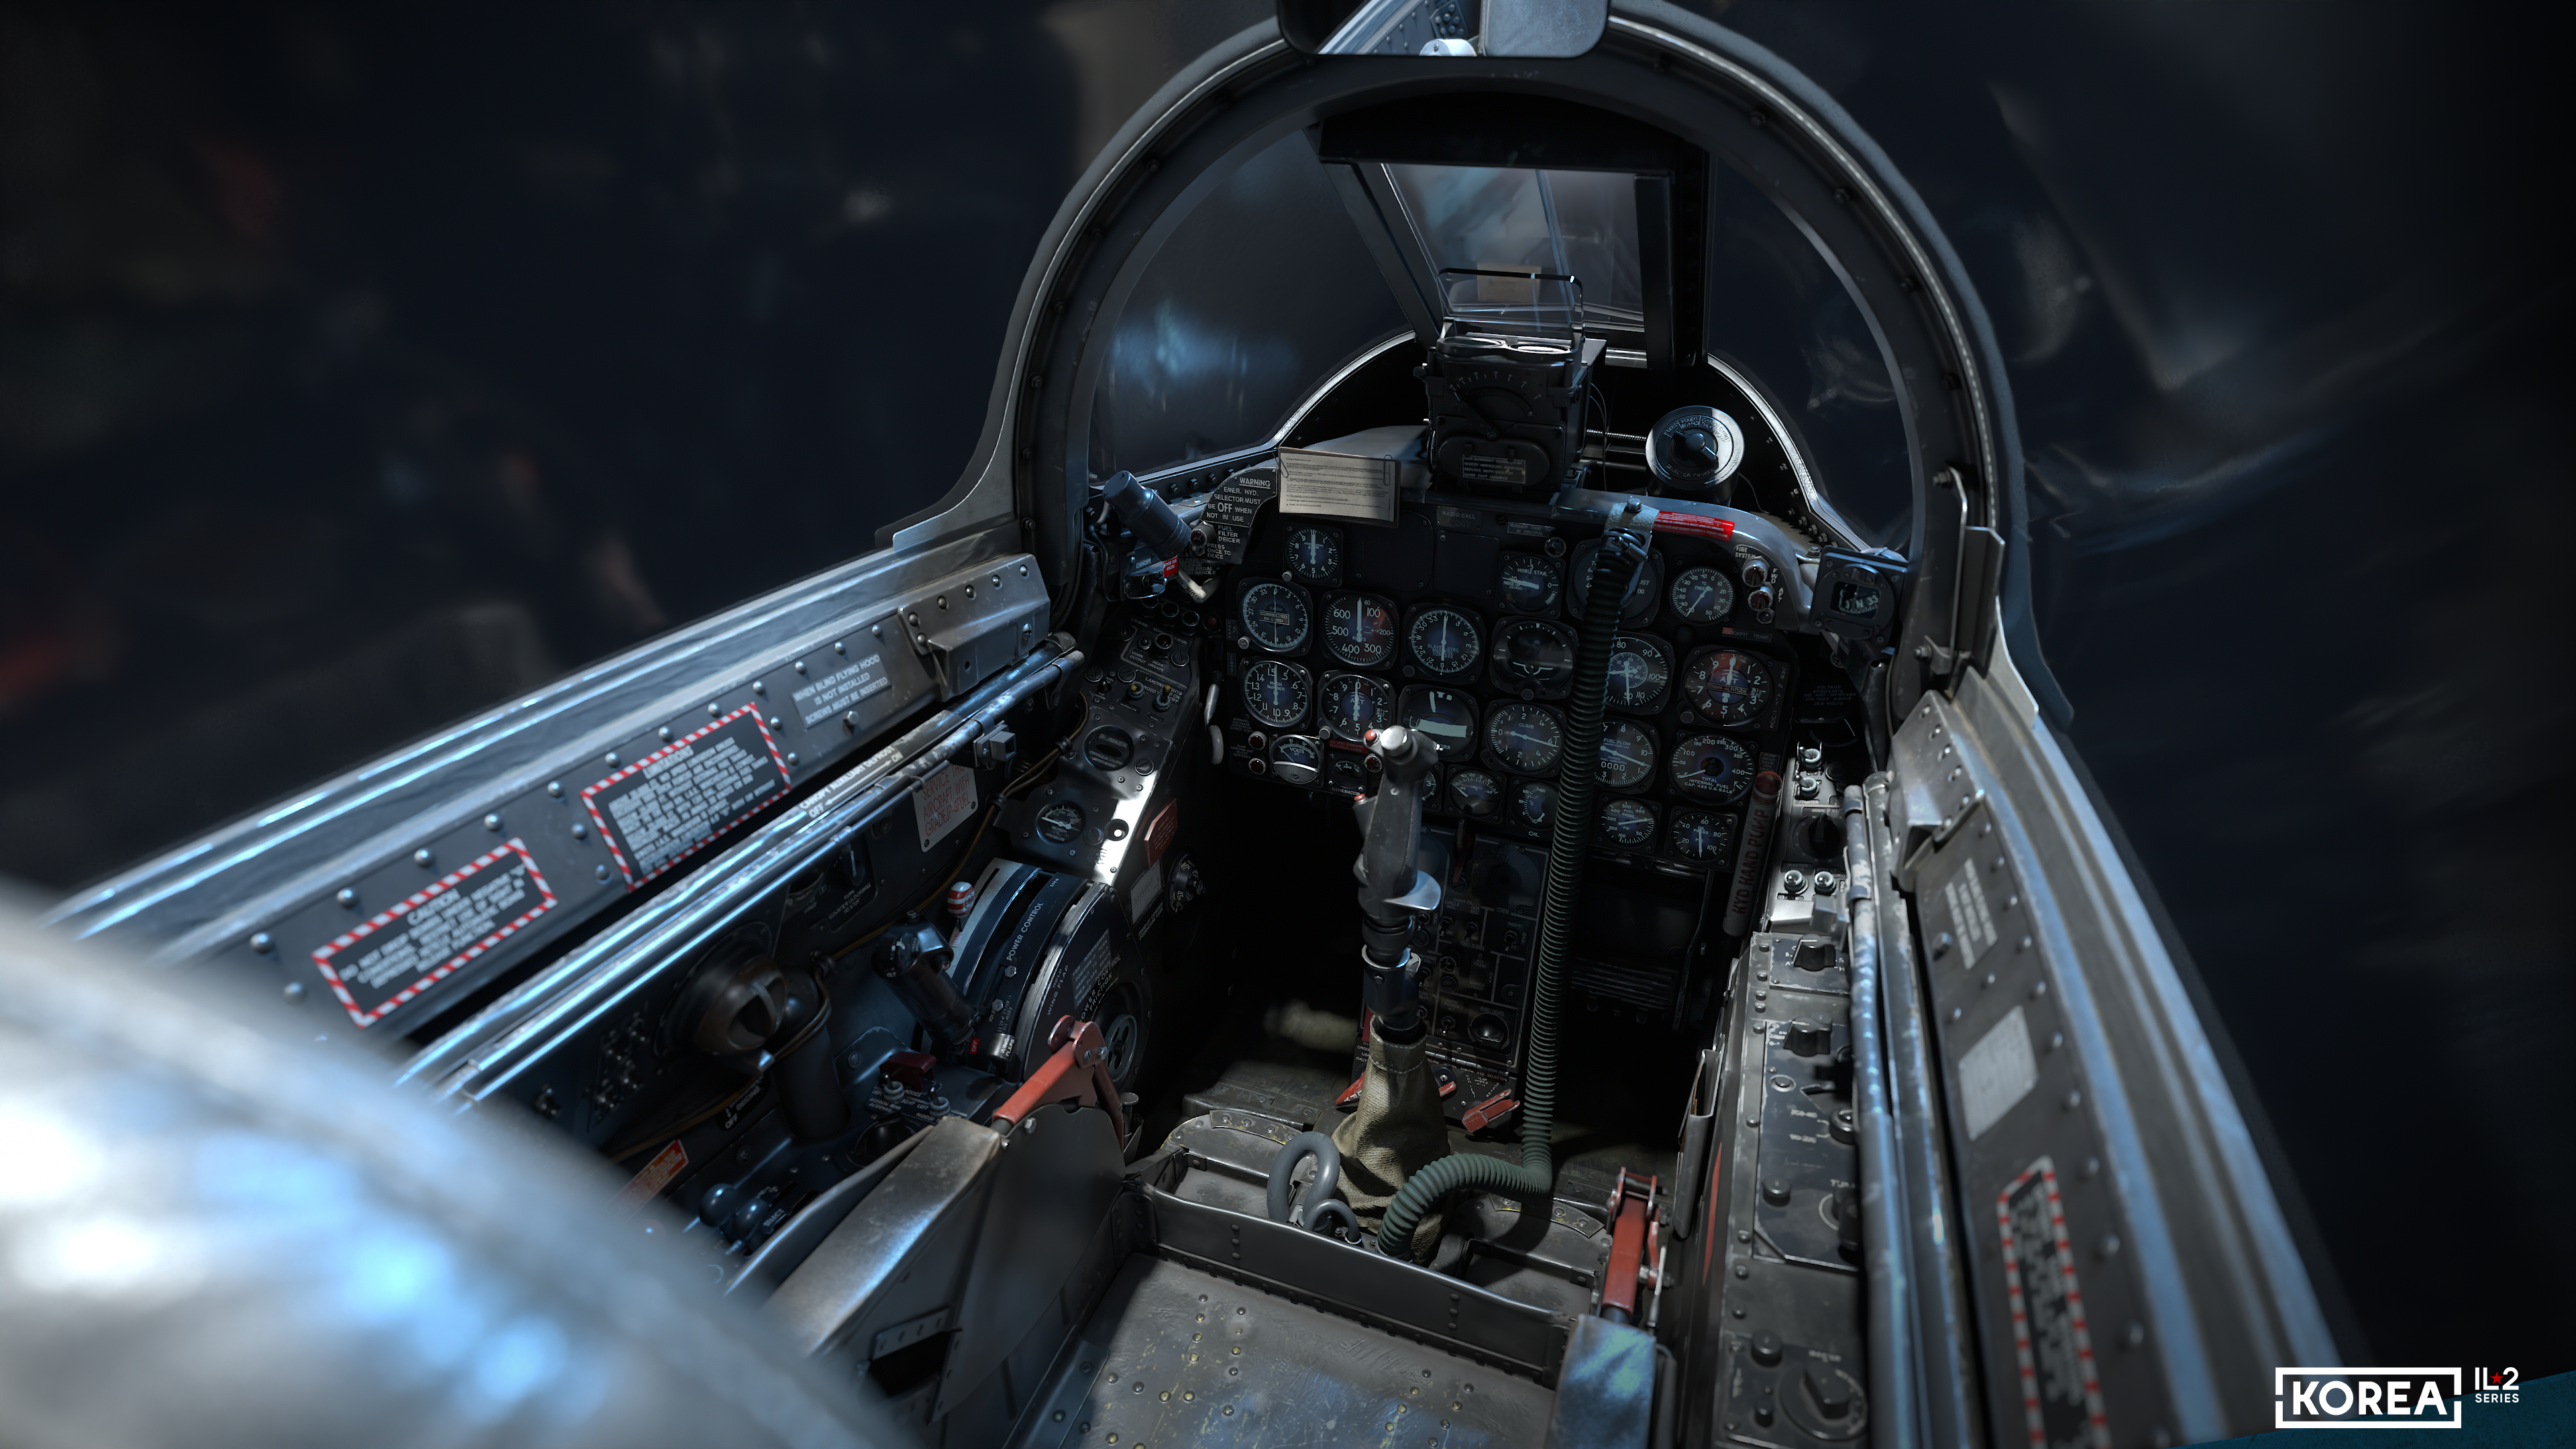
On the left side of the main instrument panel, we see a set of flight and navigation instruments and indicators: G overload, trim tab position, radio compass, gyromagnetic compass, airspeed, artificial horizon, Mach number, barometric altitude, turn indicator, and vertical speed.
The right side of the panel houses the engine and cabin pressurization system control instruments: turbine exhaust temperature, cabin temperature, engine RPM, cabin altitude (pressure), fuel flow meter, fuel gauge, fuel pressure, and engine lubrication system oil pressure. The lower part of the center panel houses the electrical system monitoring instruments and warning lights.
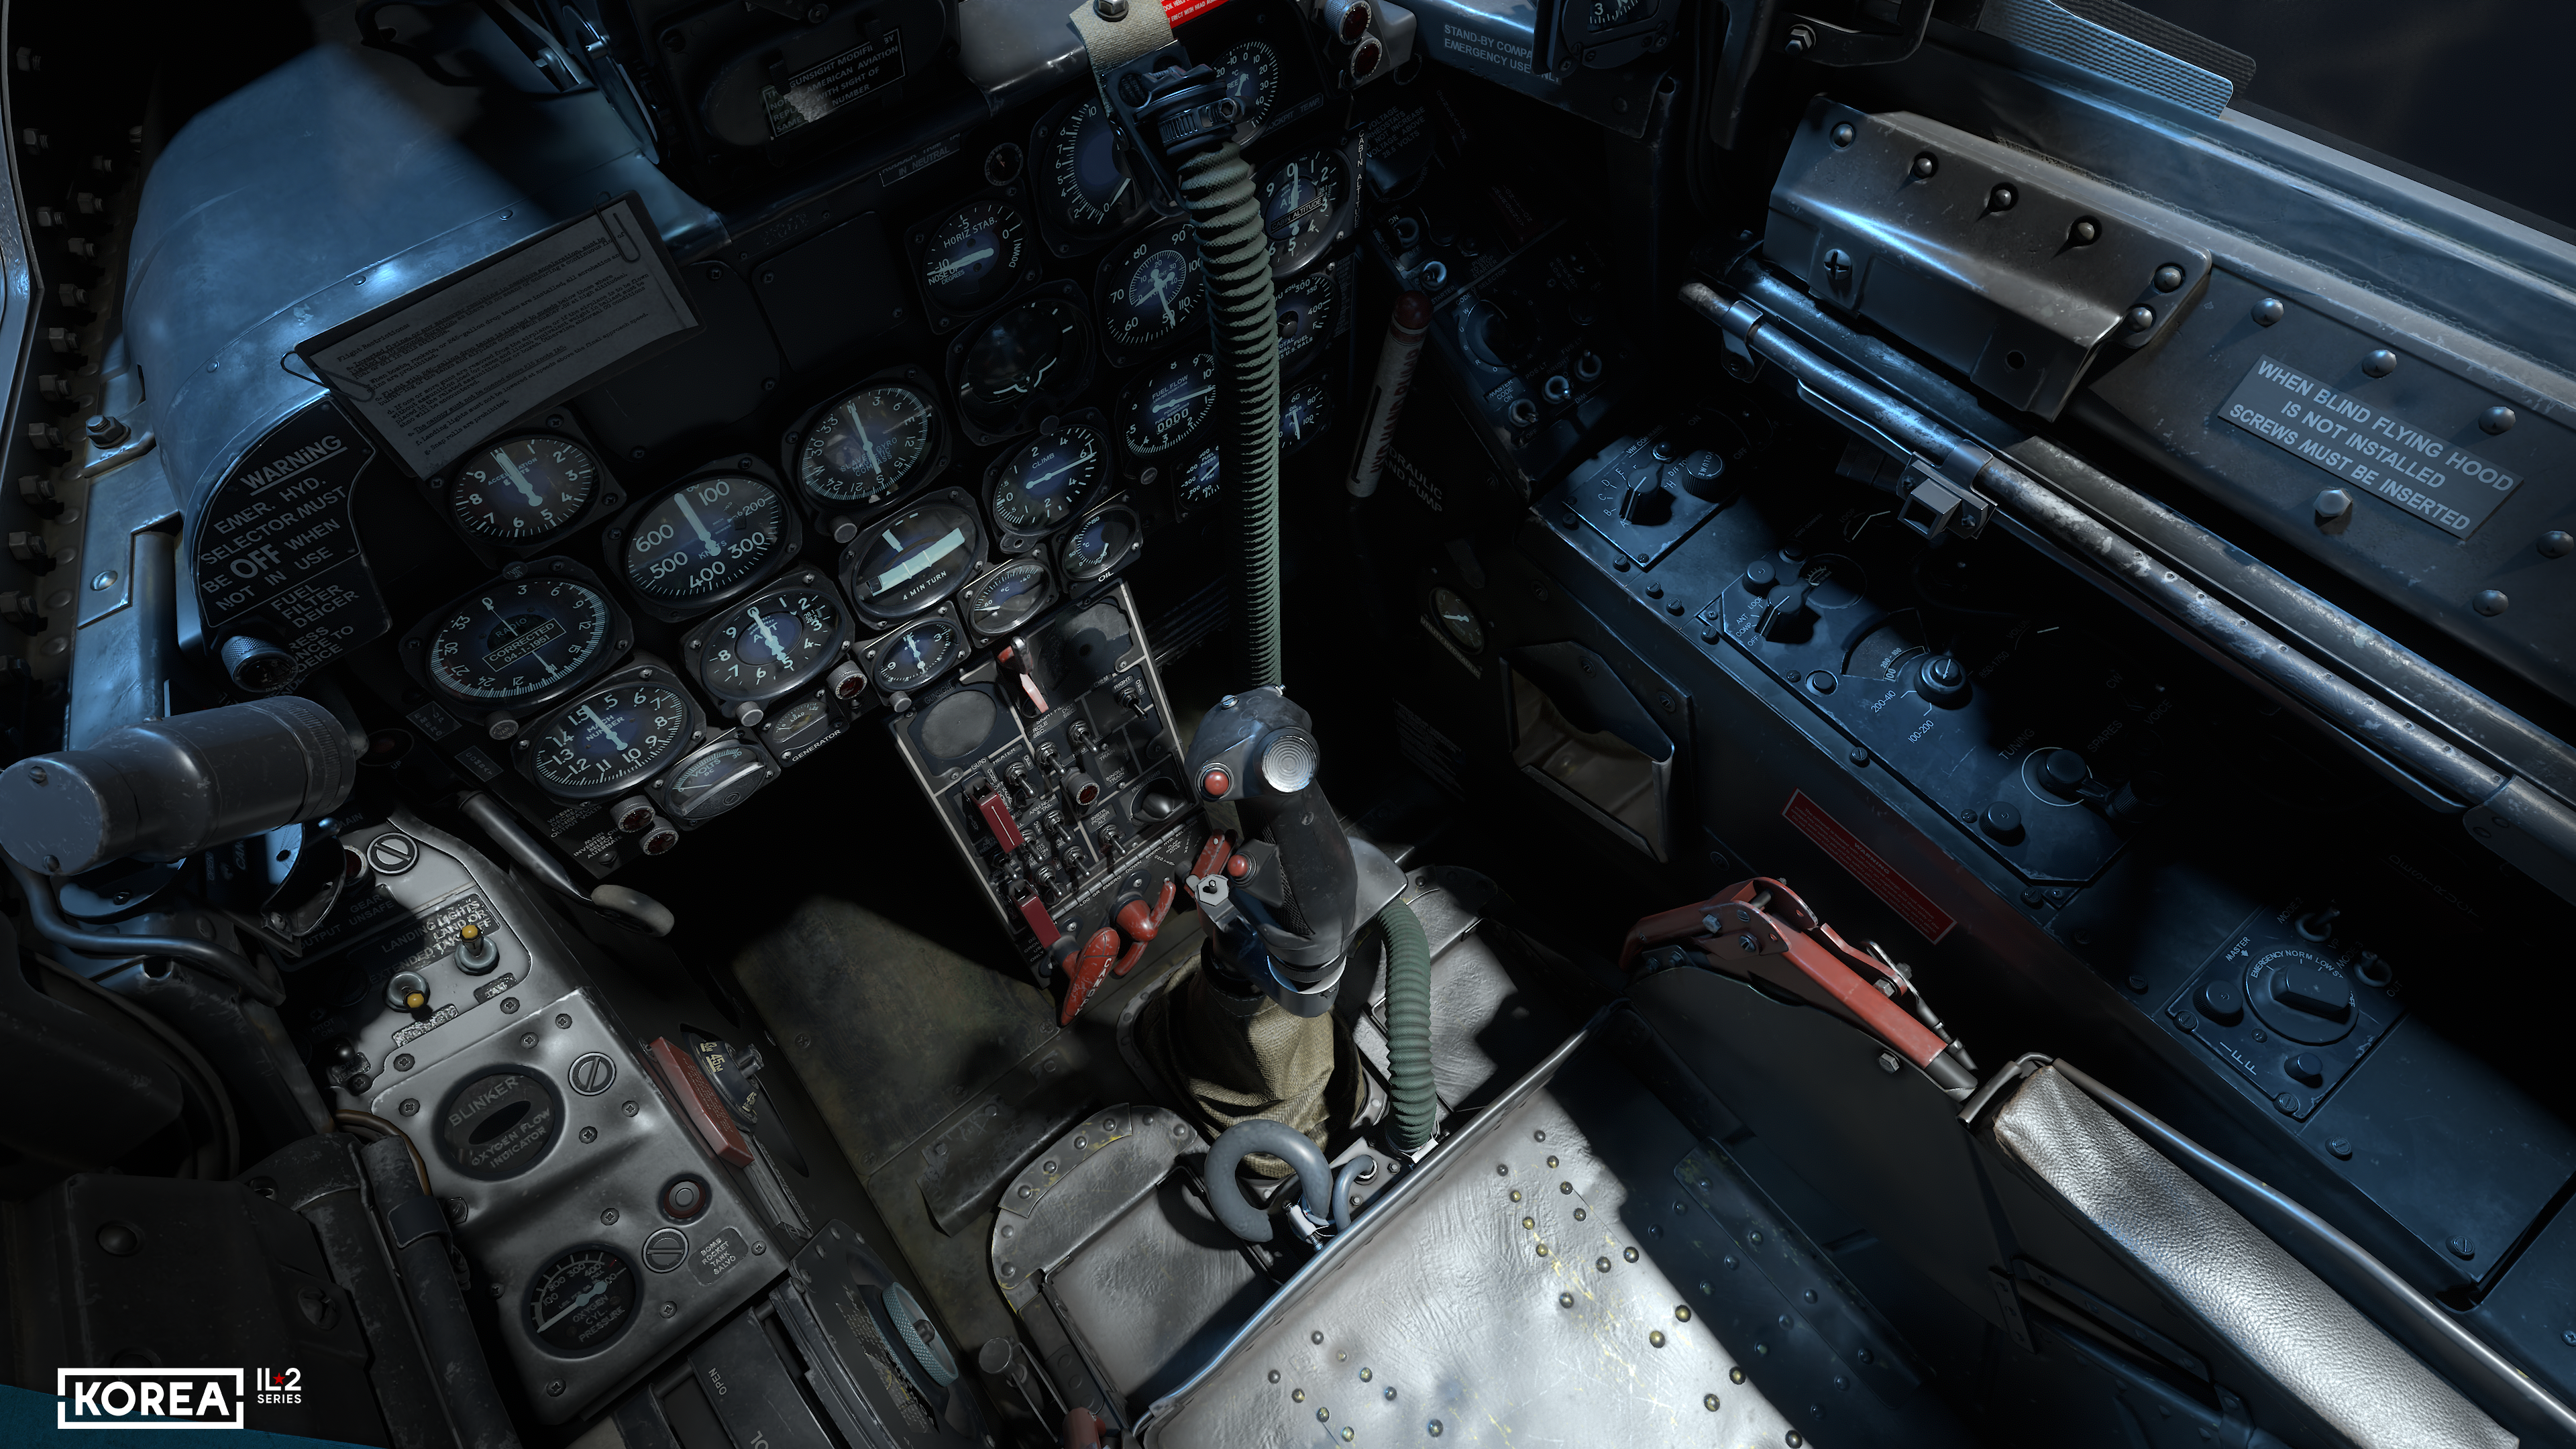
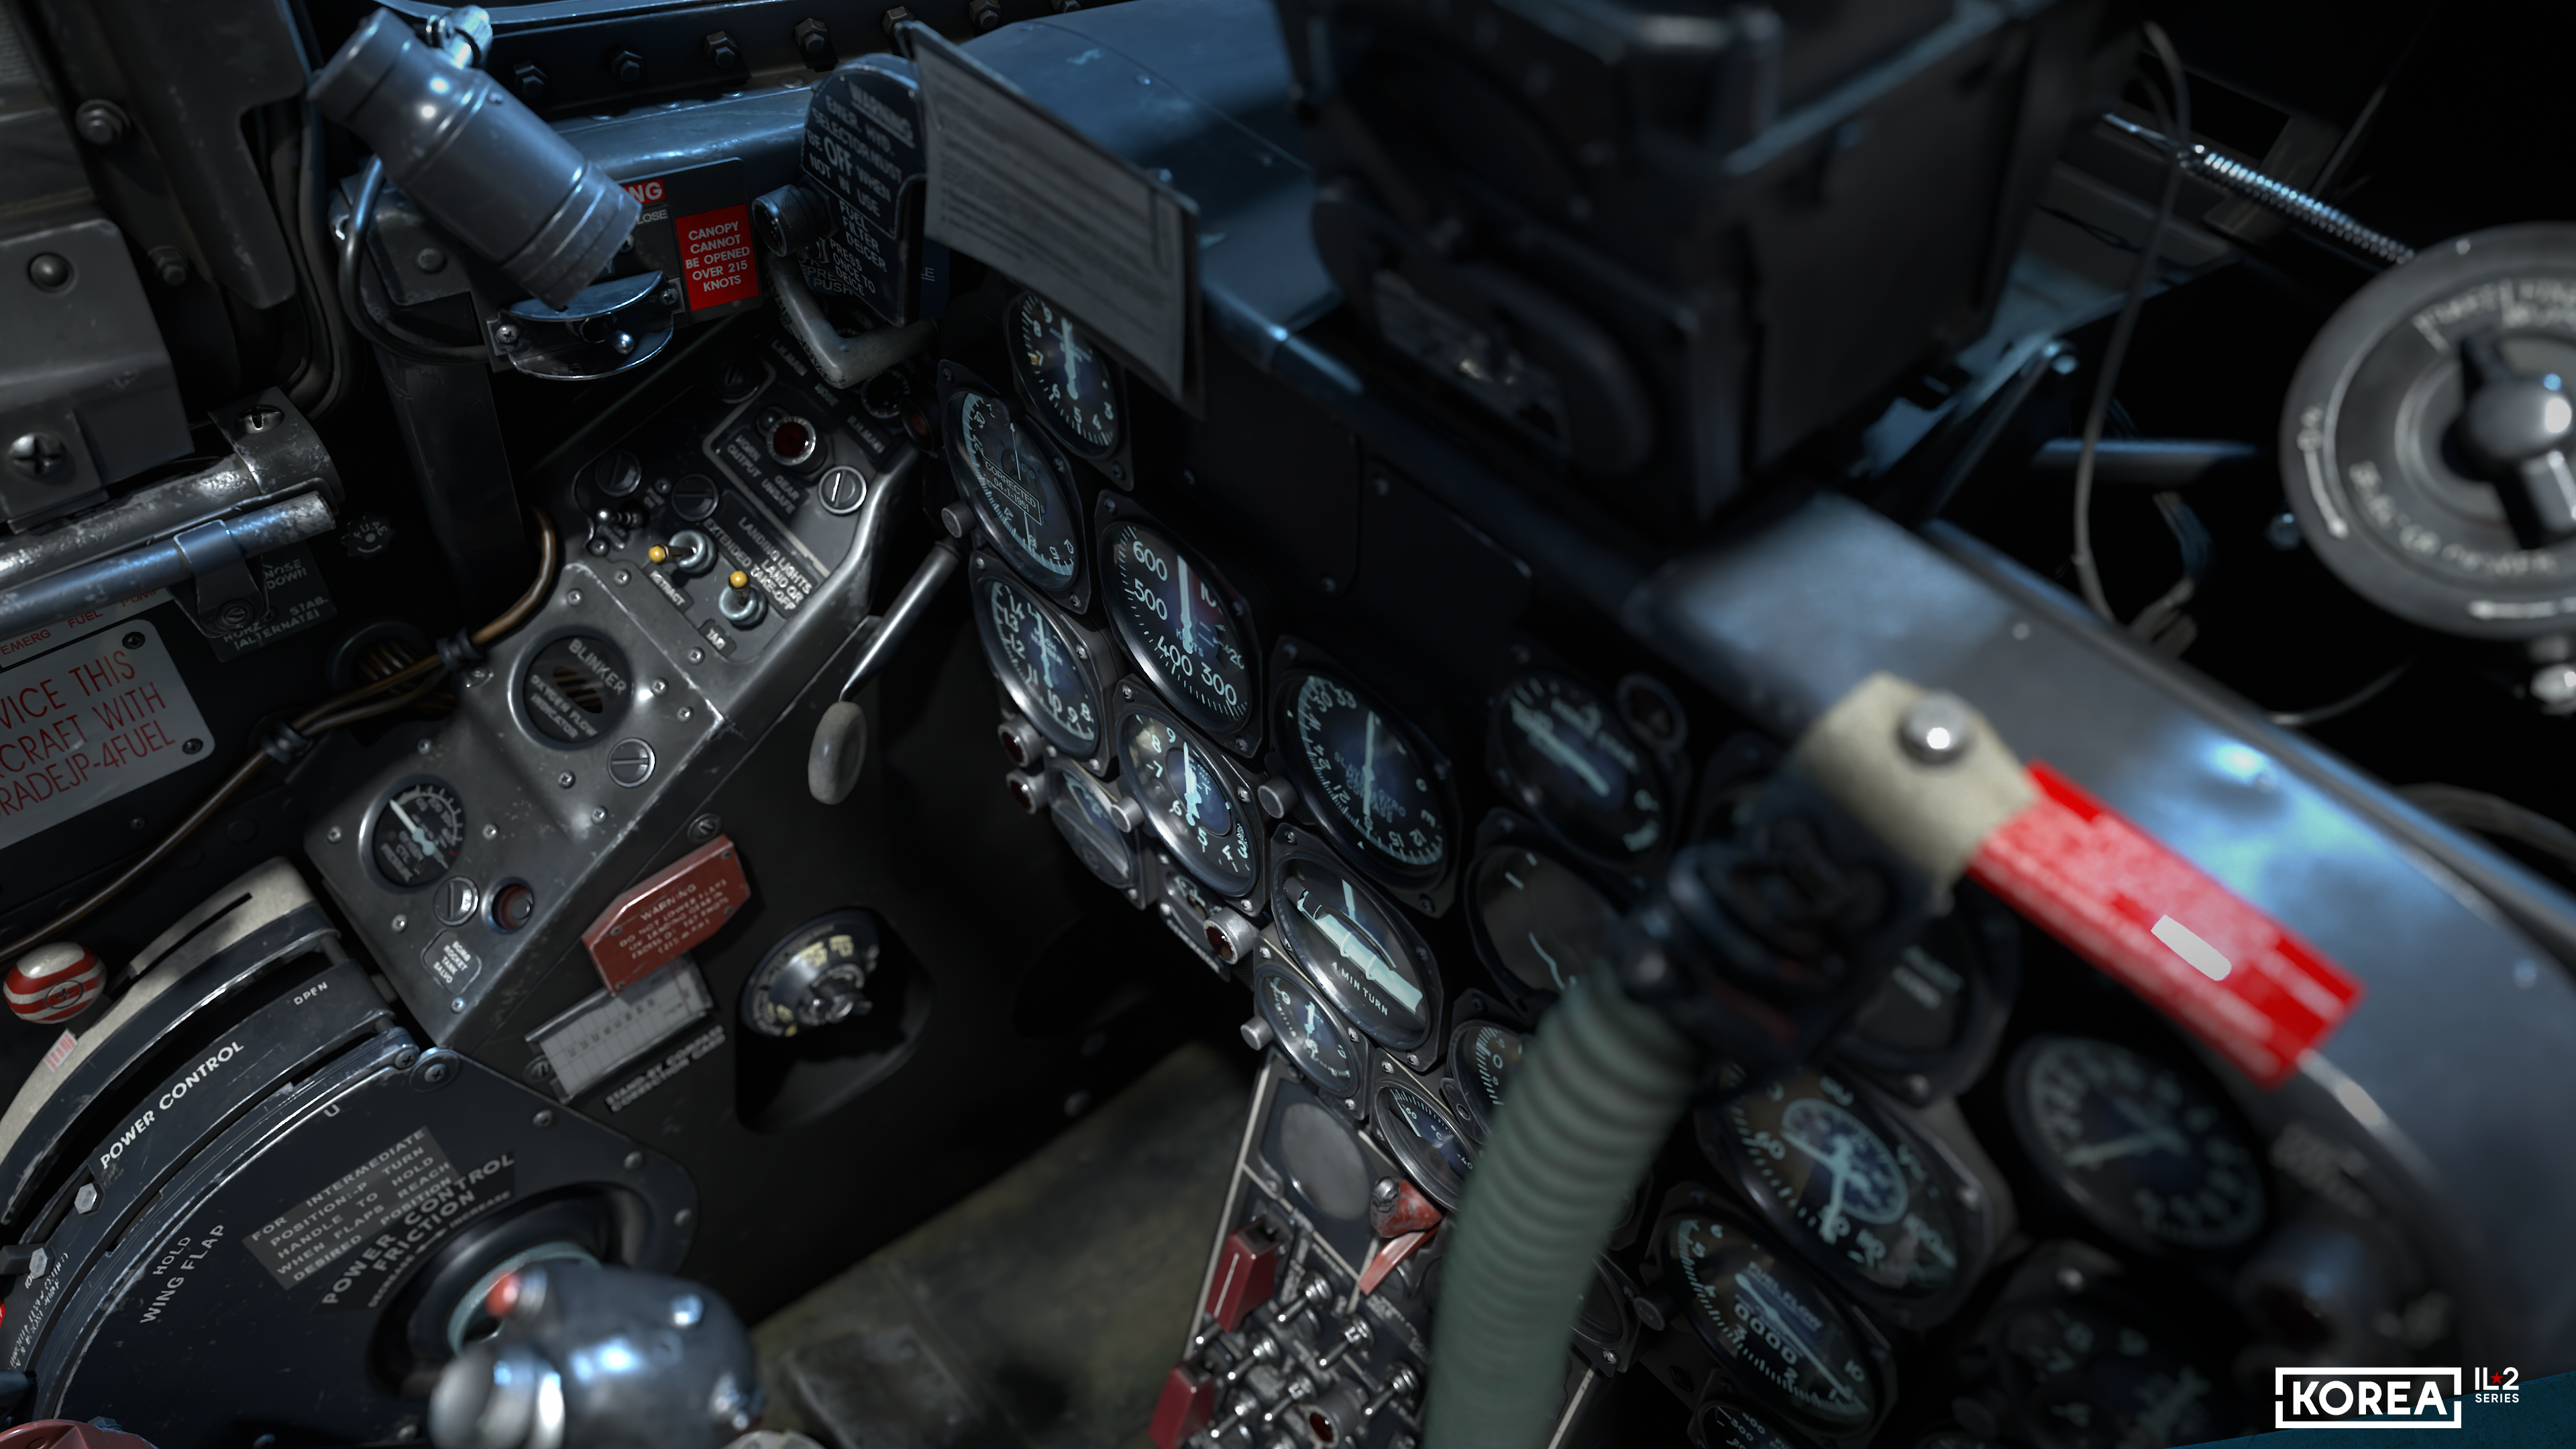
Below the main panel is the weapons control panel. In its central part, we see a bracket for securing the aircraft control stick when parked. This panel features switches that the pilot uses to set the intervals and sequence for dropping bombs, activate the weapons bay heating, and perform other functions. Below the weapons panel is a group of three emergency switches: the hydraulic system, landing gear release, and canopy release.
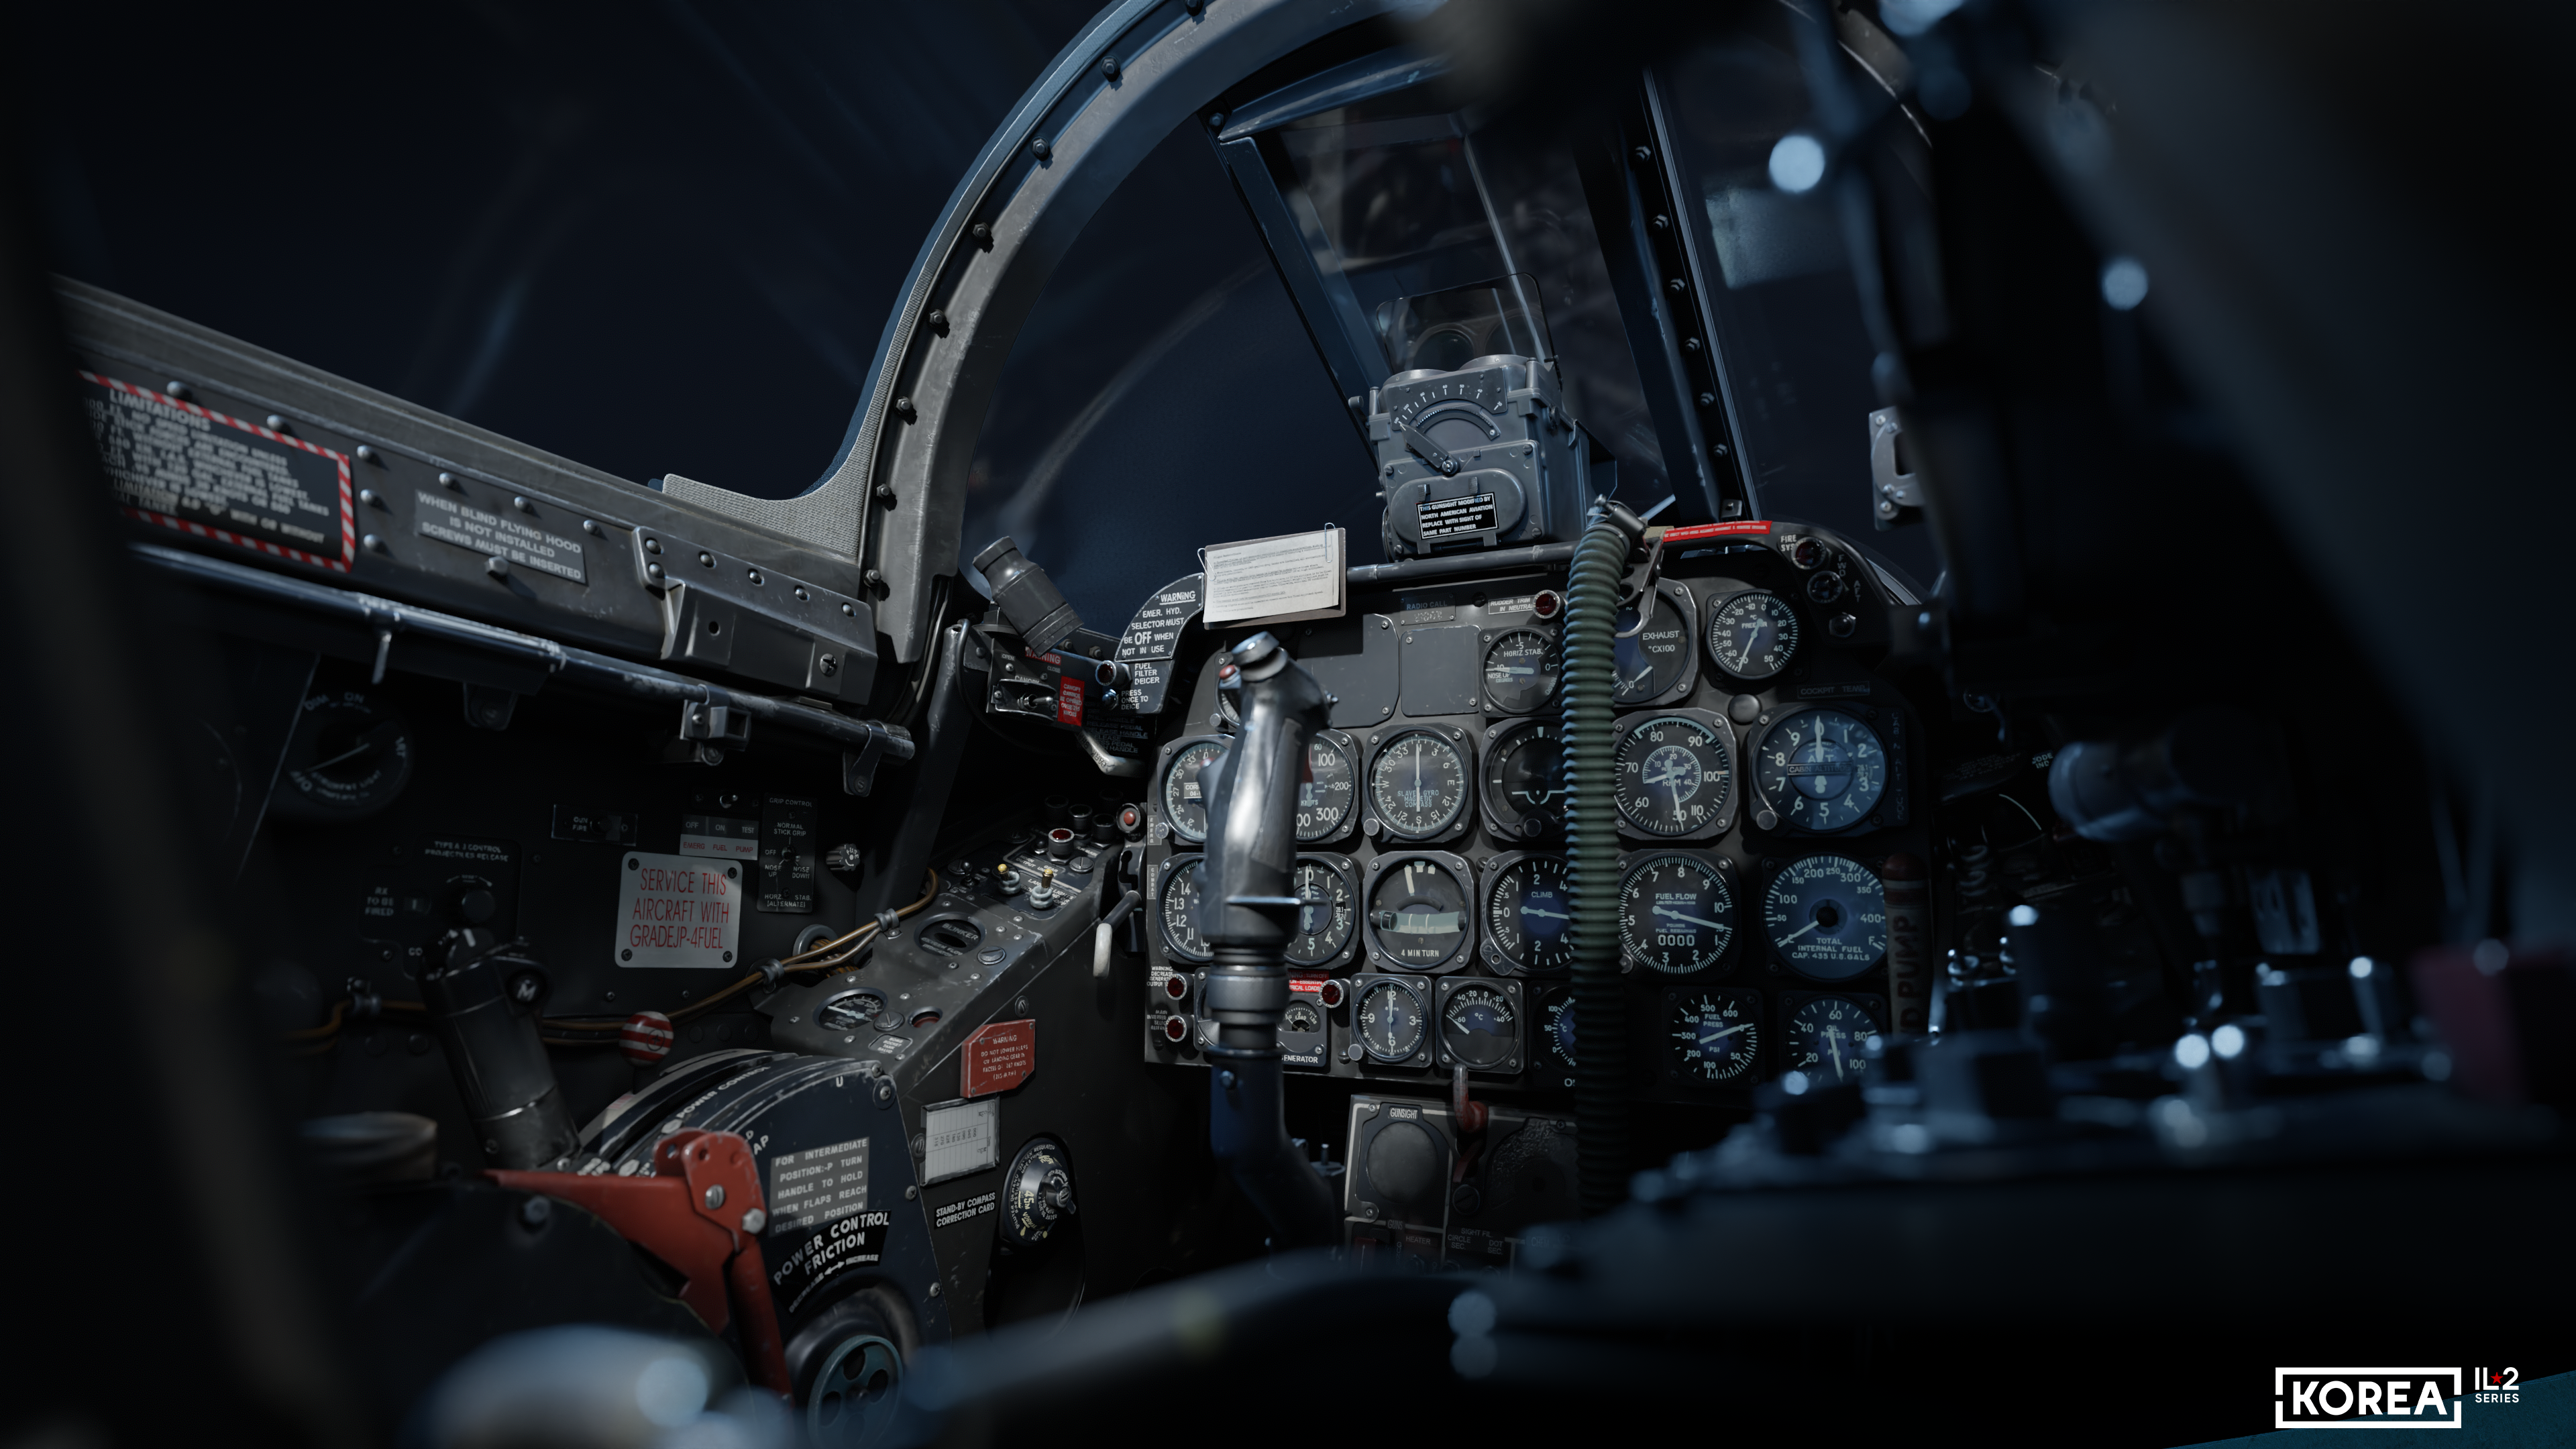
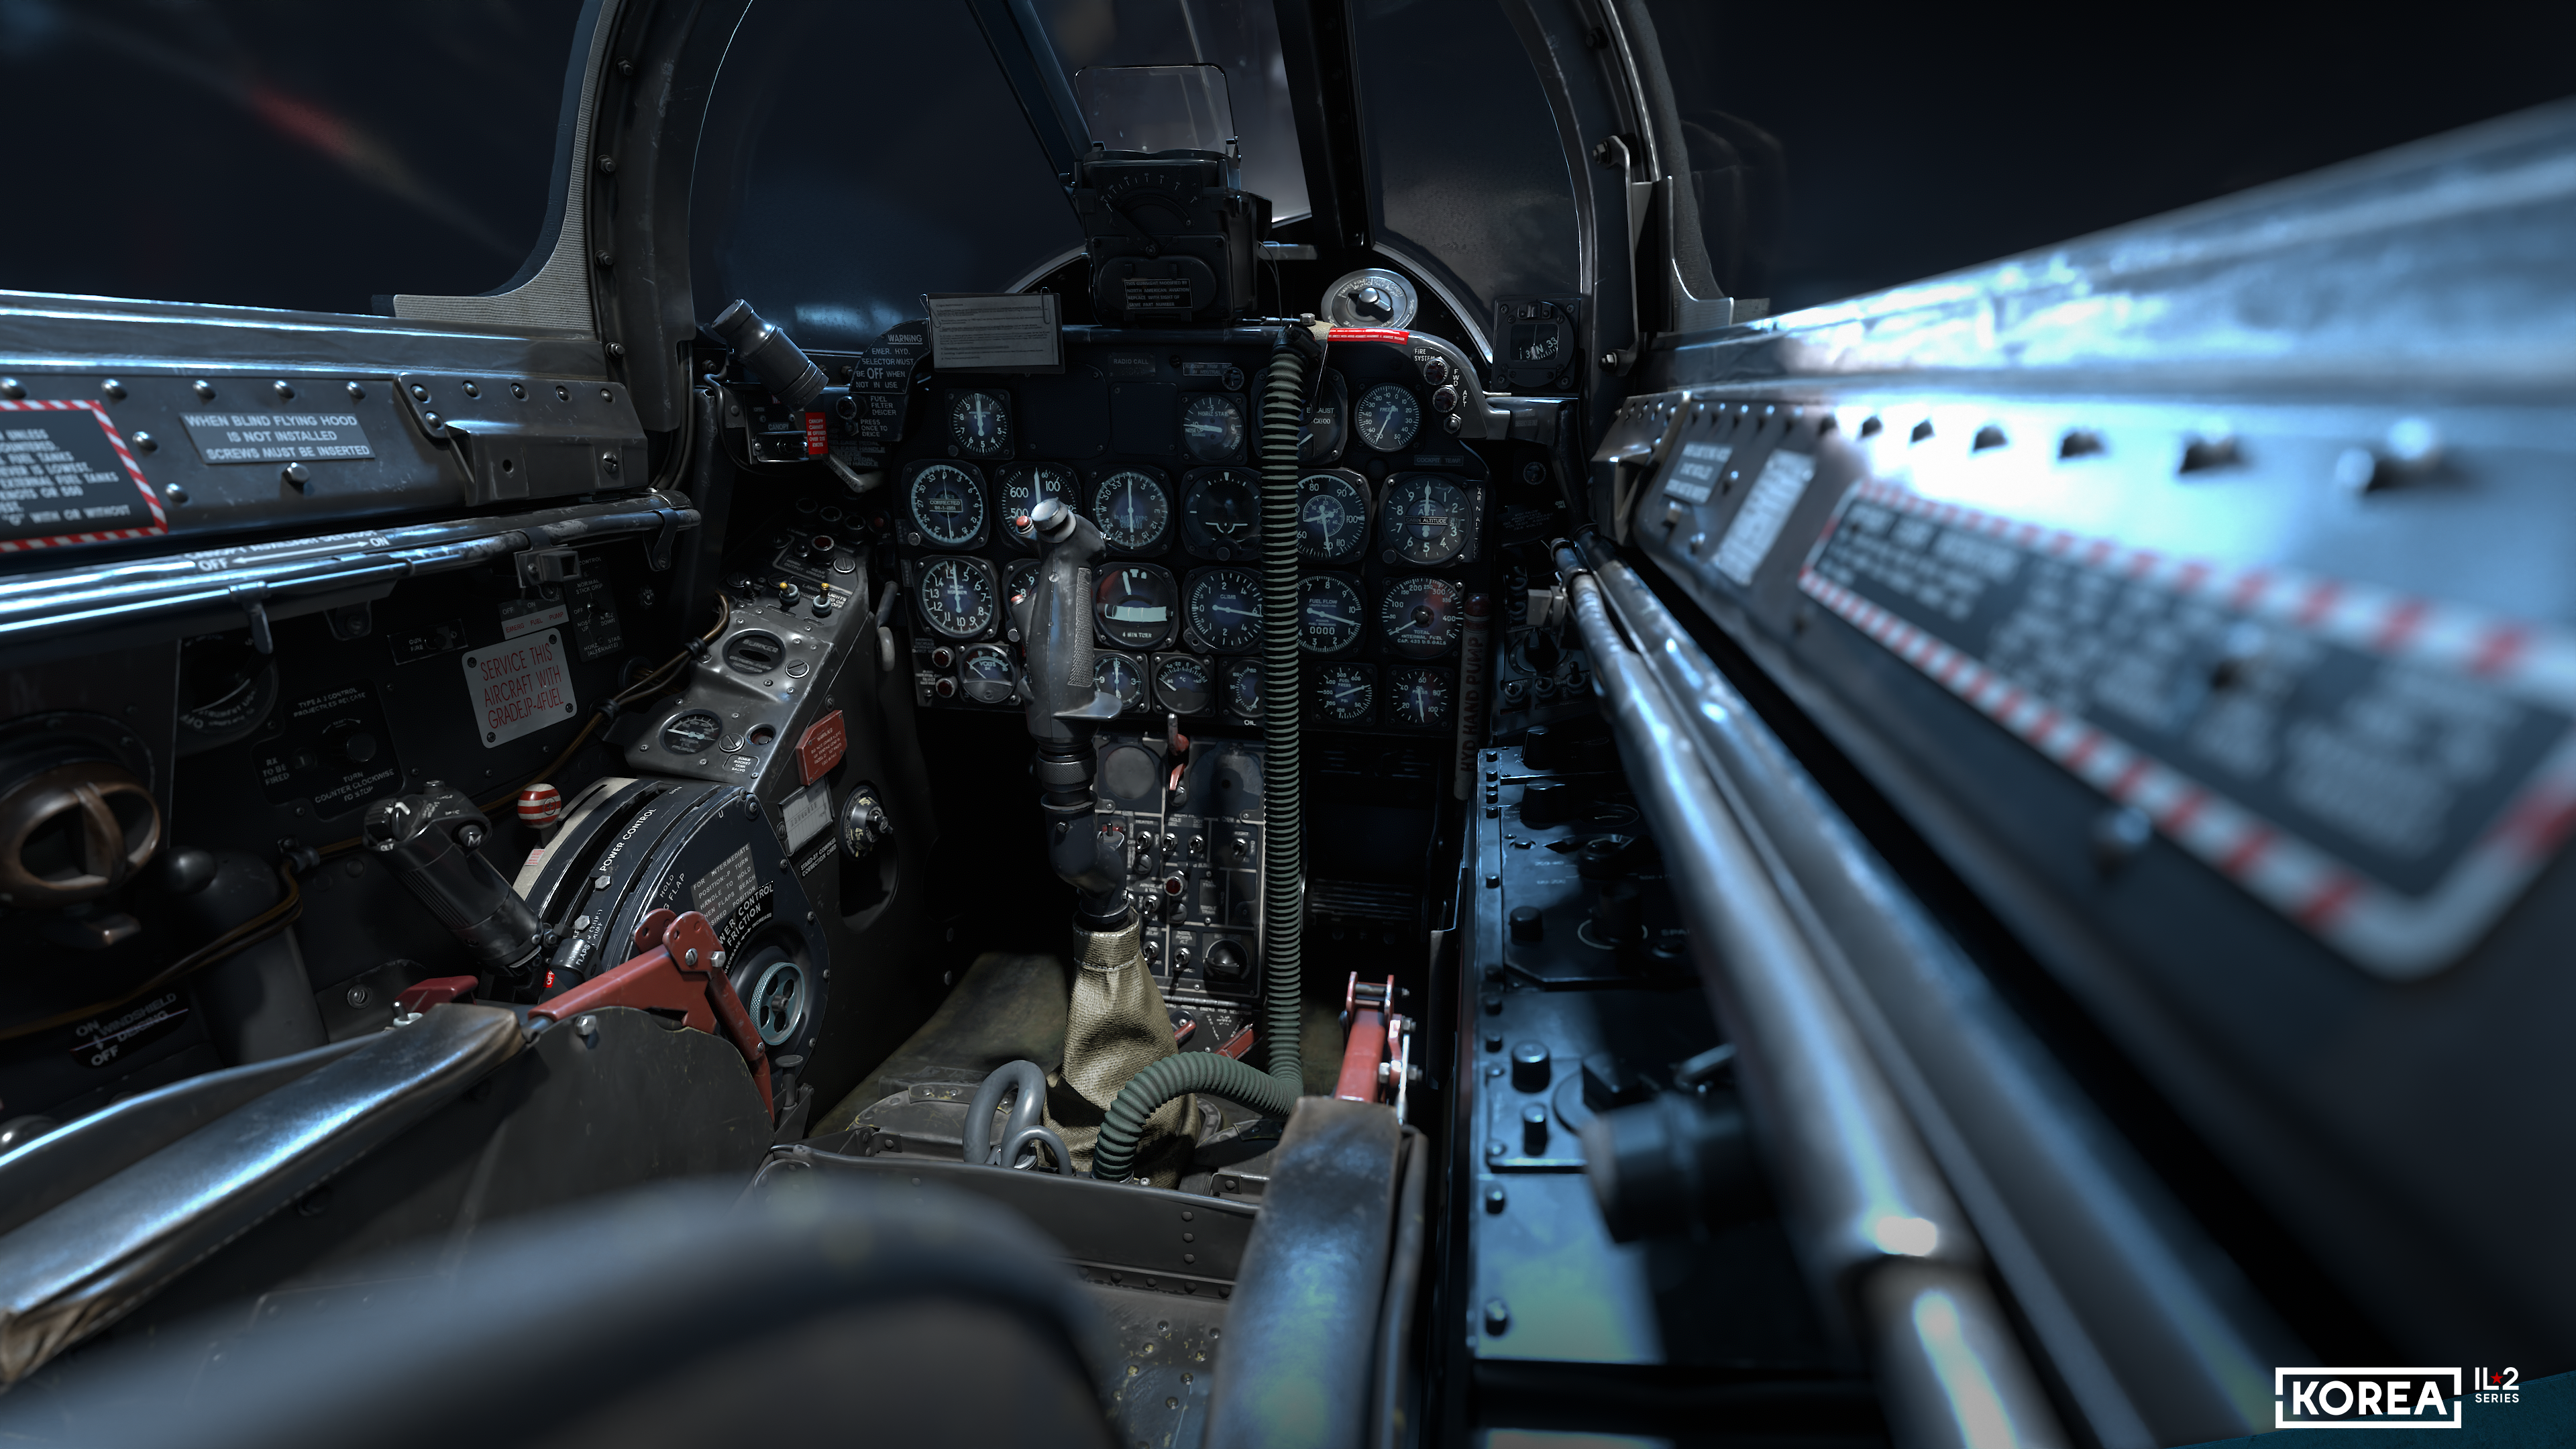
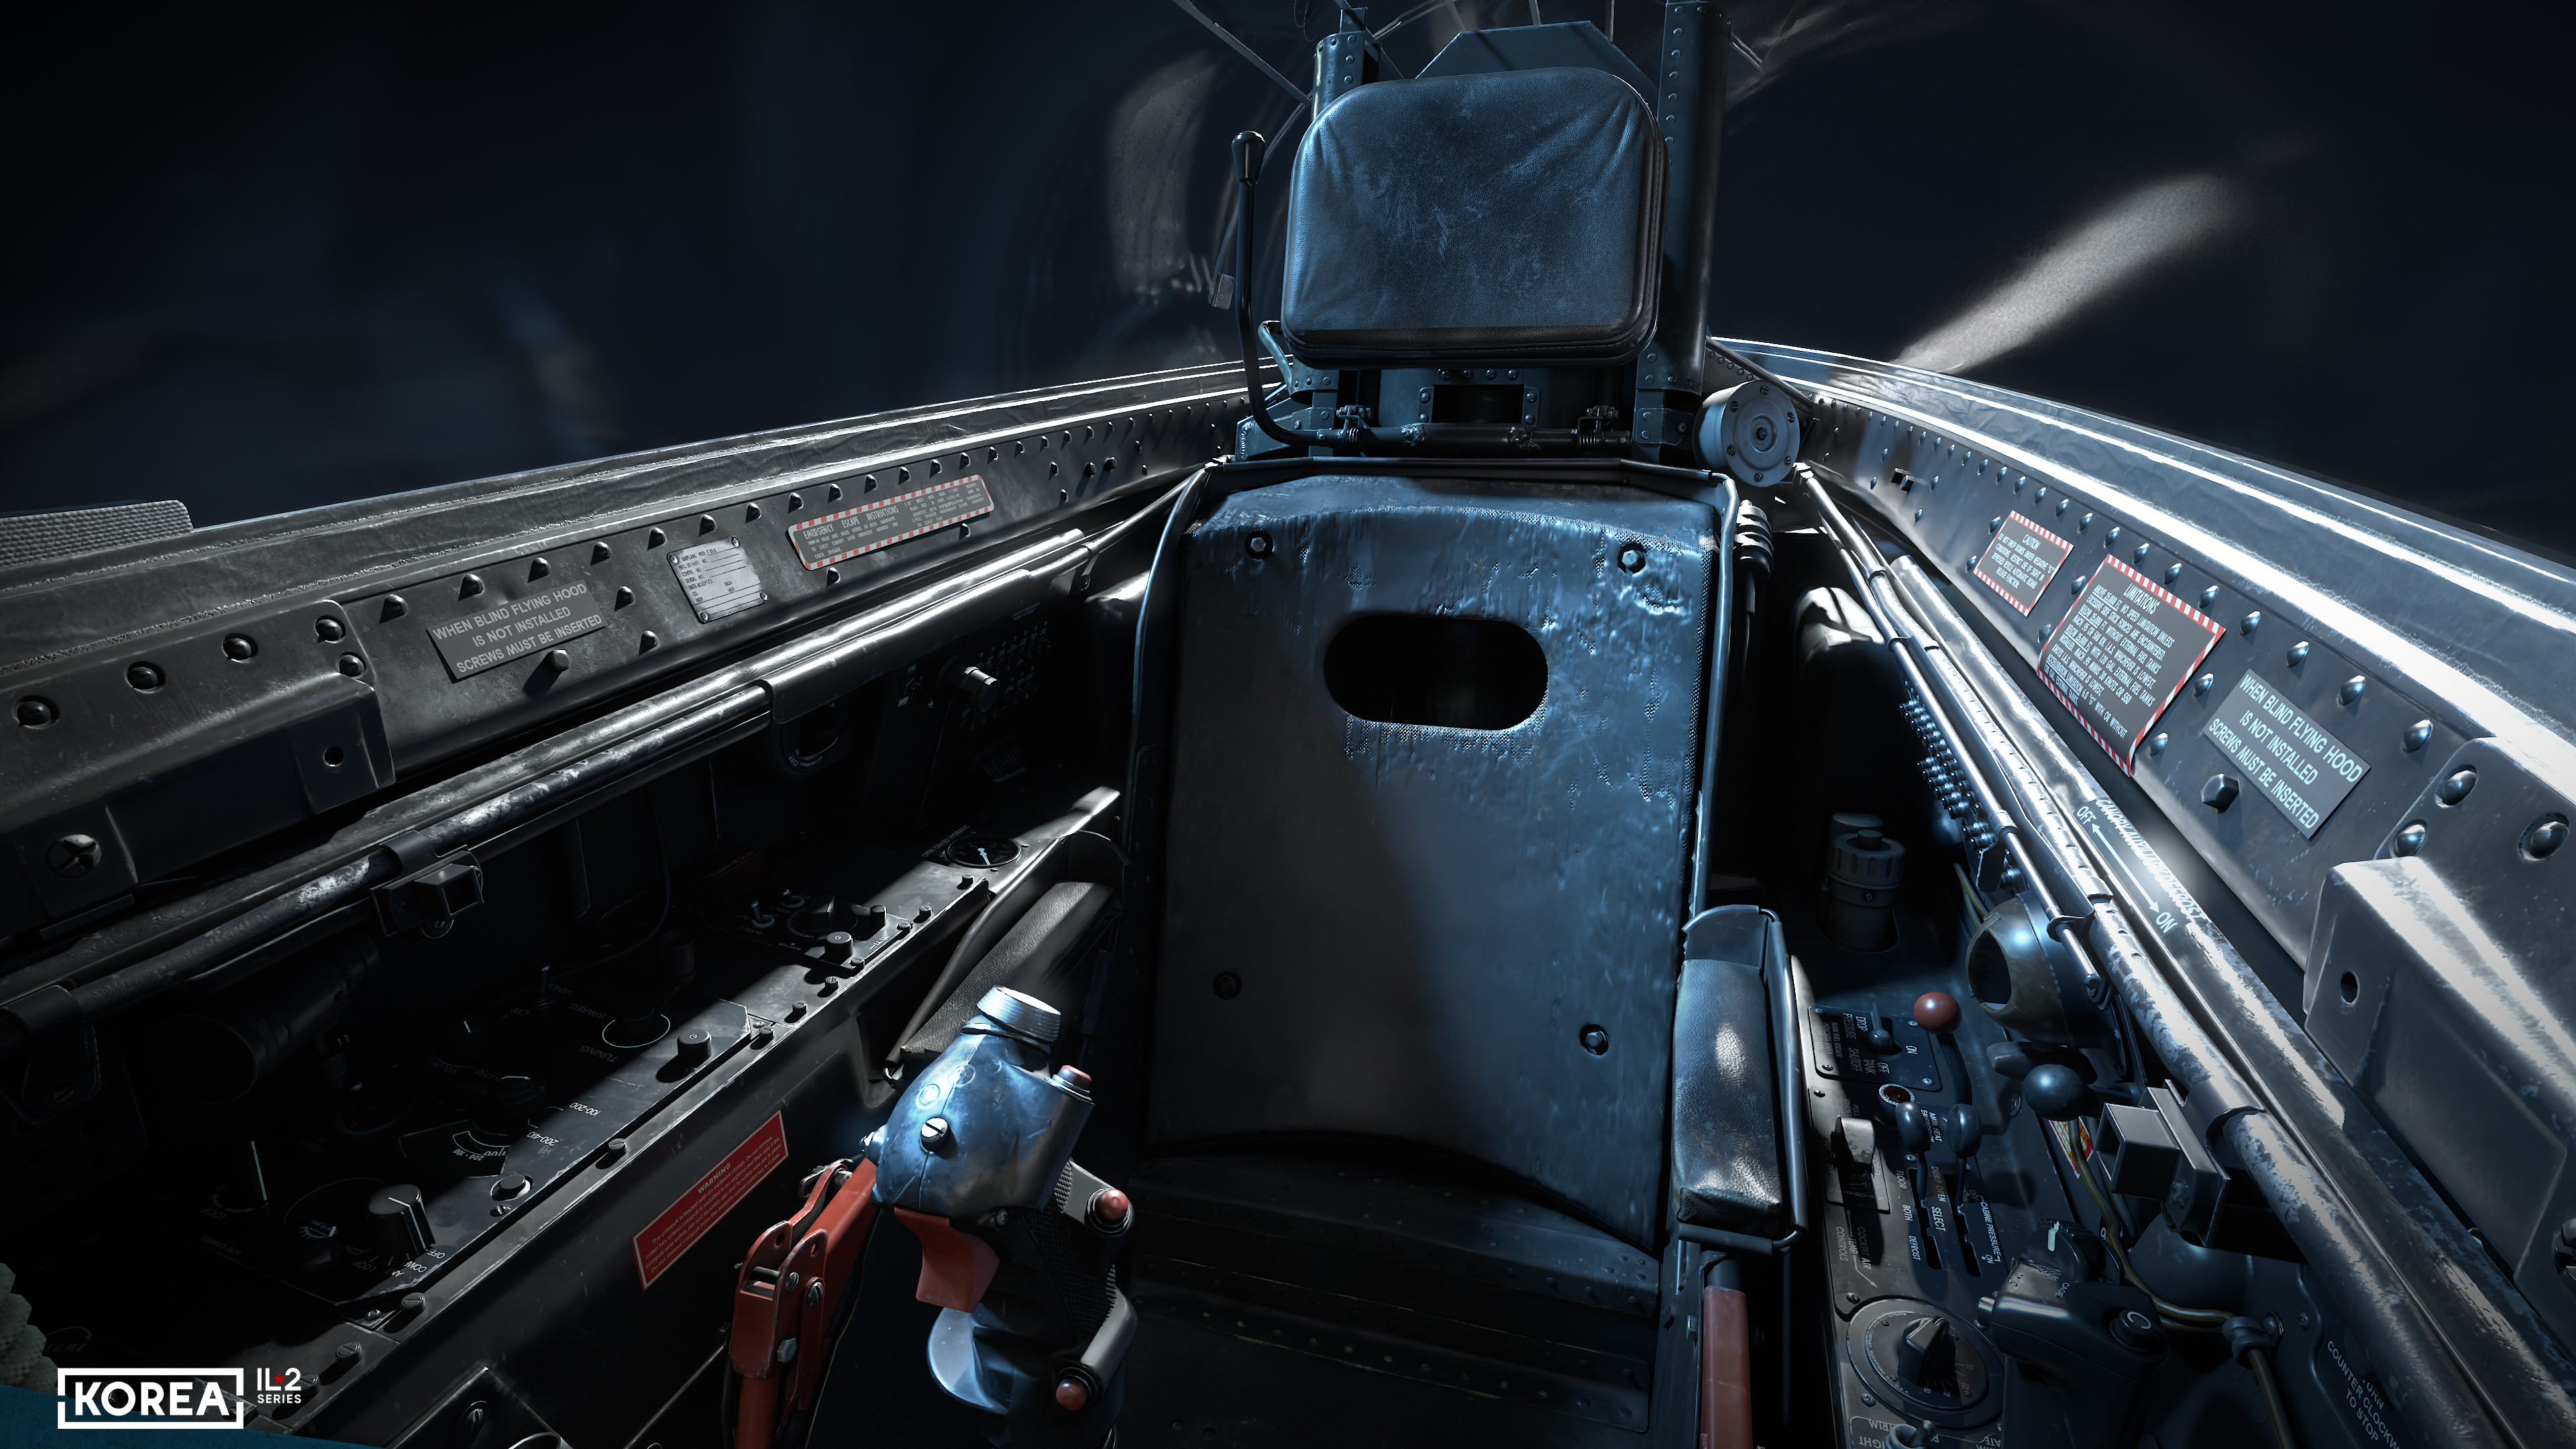
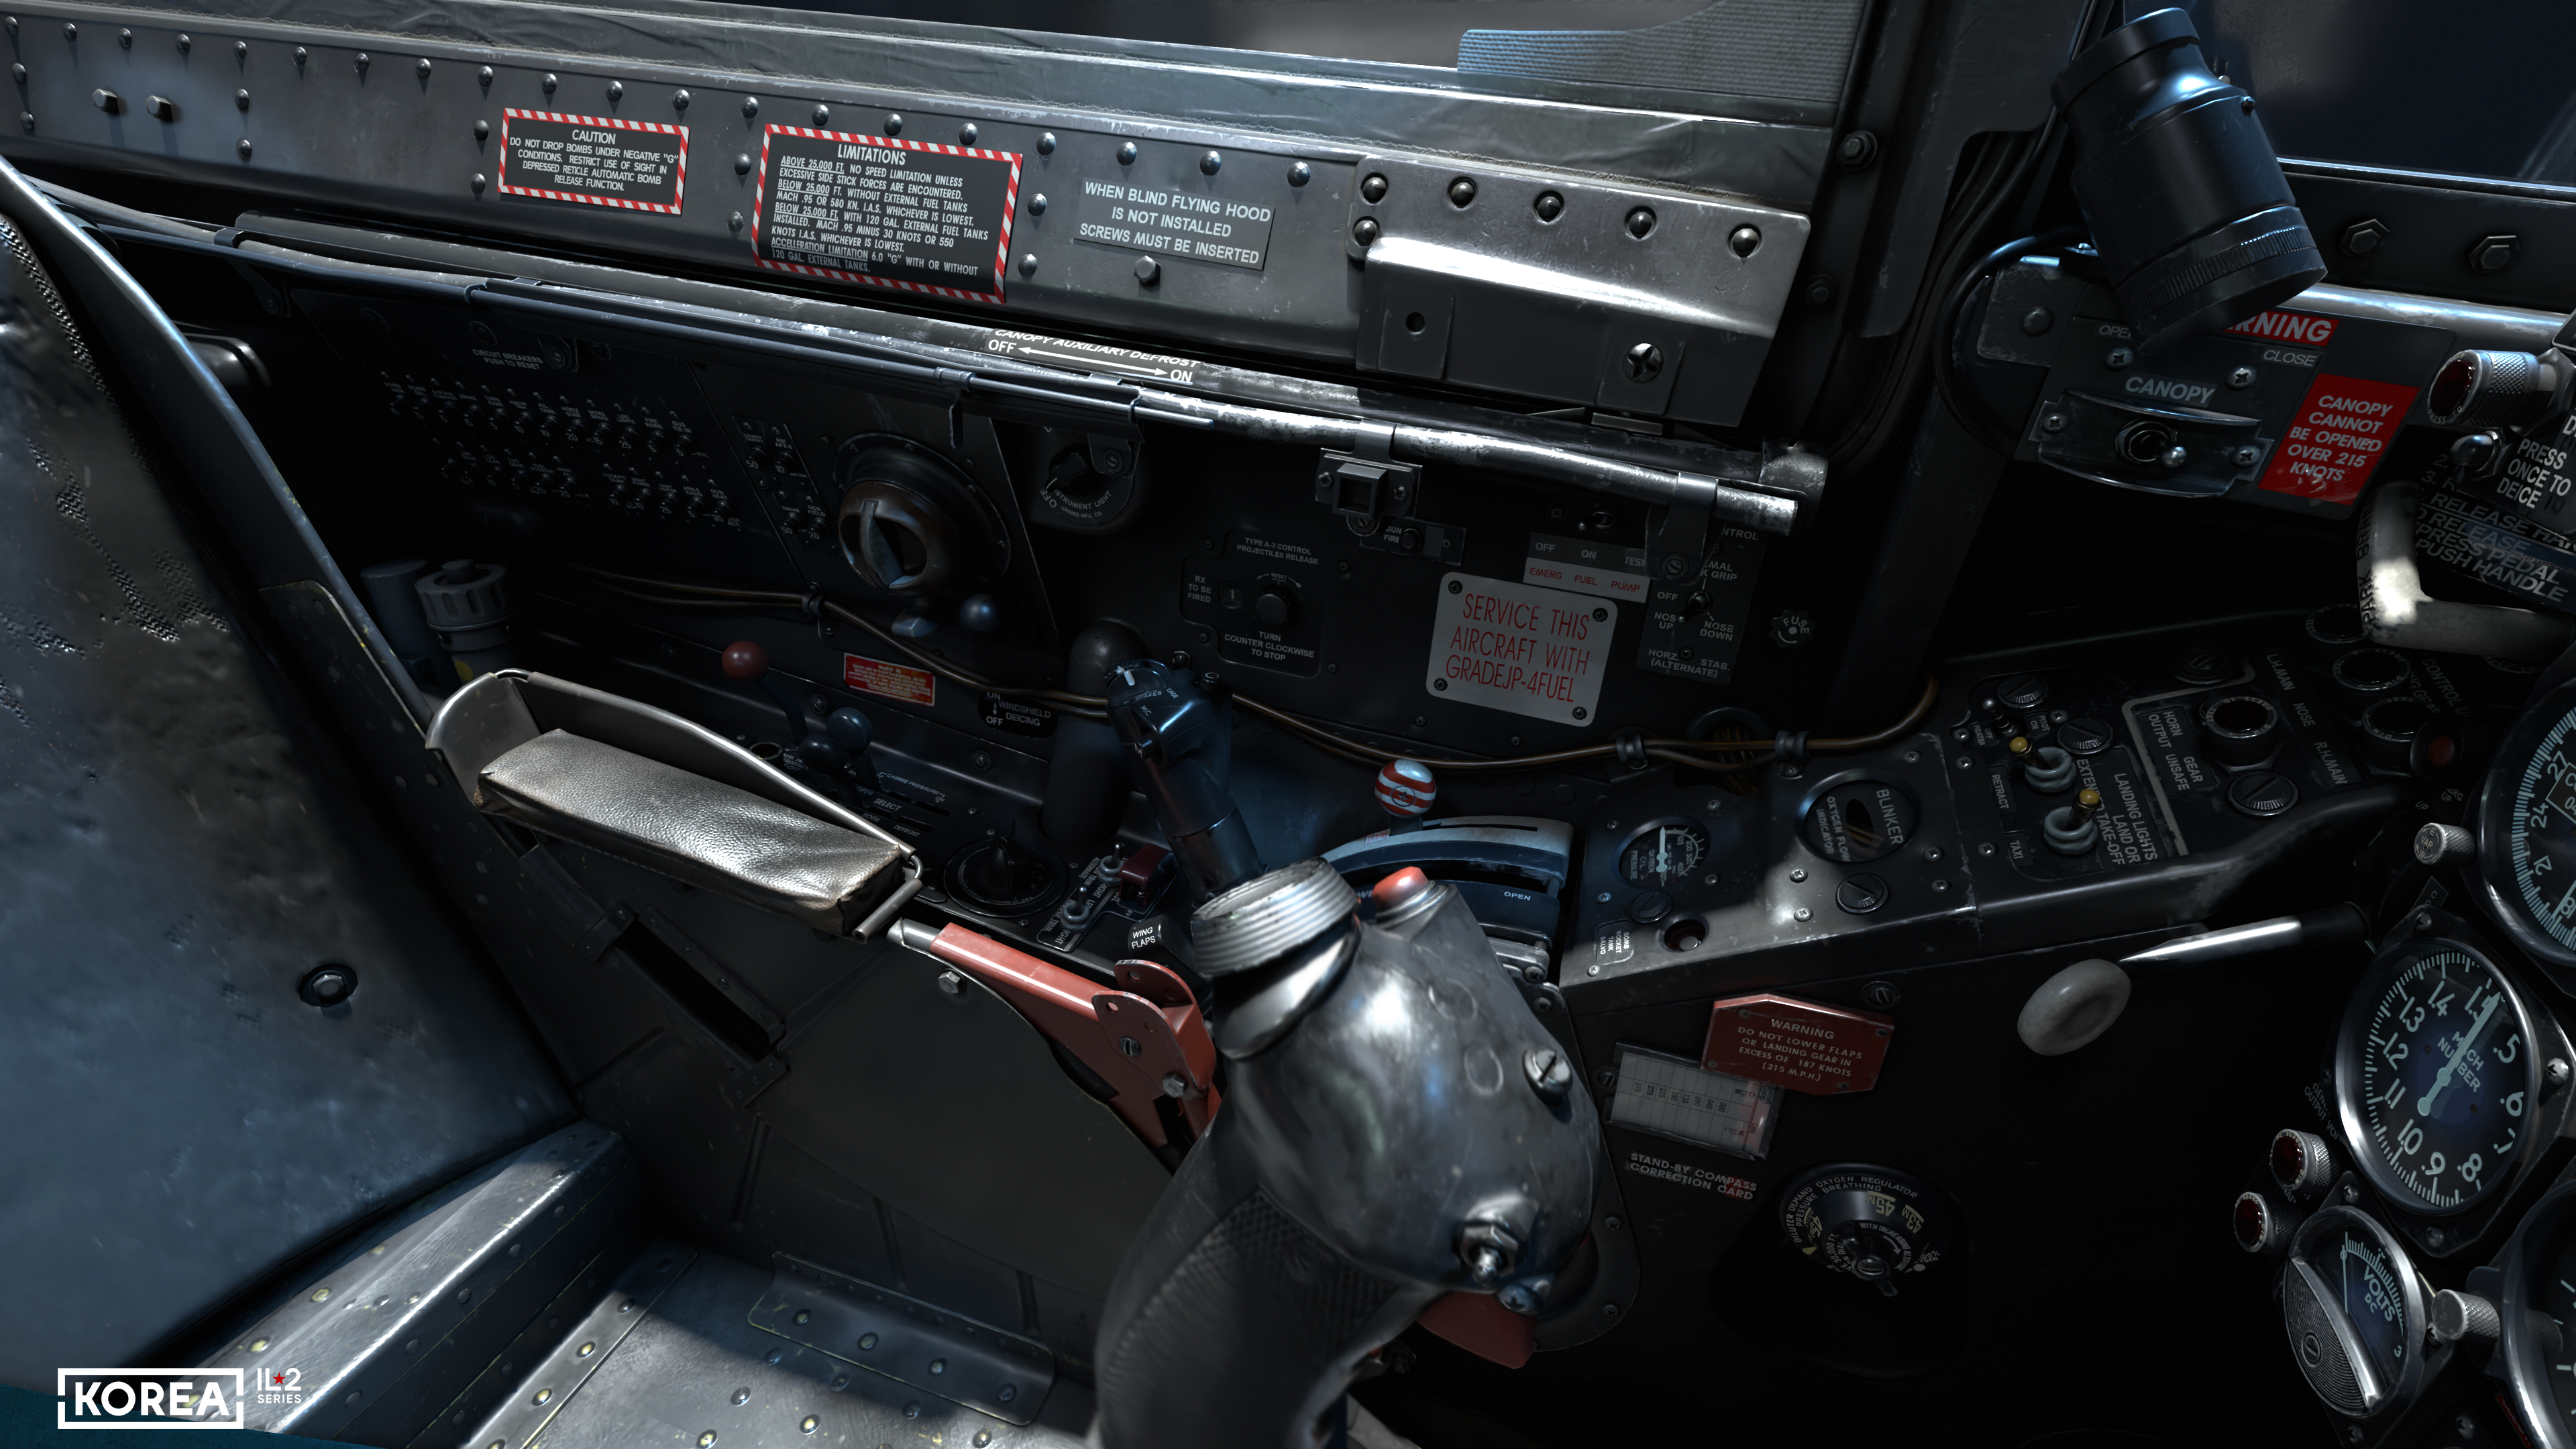
On the left-hand side of the cockpit, from front to rear, are the canopy actuation switch, parking brake lever, position indicators, and the landing gear control lever, two indicators and the oxygen system economizer lever, next to them the emergency release button for external ordnance, then the engine throttle control lever and next to it the emergency air brake release lever. Right there, in the center of the side, is the rocket launch control handle, which didn’t fit on the weapons control panel.
Further back, there is a block of controls for the cabin pressurization system, followed by a switch for pressurizing the drop tanks and a large block of electrical fuses above it. At the very end is a large handle for regulating the pressurization of the anti-G suit.
On the right side, at the front near the main panel, we see a backup magnetic compass, the aircraft startup panel, and the controls for the formation and running lights. There is also a large red and white lever for manually pumping the hydraulic system, as well as a pressure gauge for the auxiliary hydraulic system. In the central part of the right-hand side, a large radio control unit is located, followed by the AN/APX-6 transponder control unit, which features a self-destruct switch under a red cap. Behind it is the main hydraulic system pressure gauge. At the very rear, there is another fuse block.
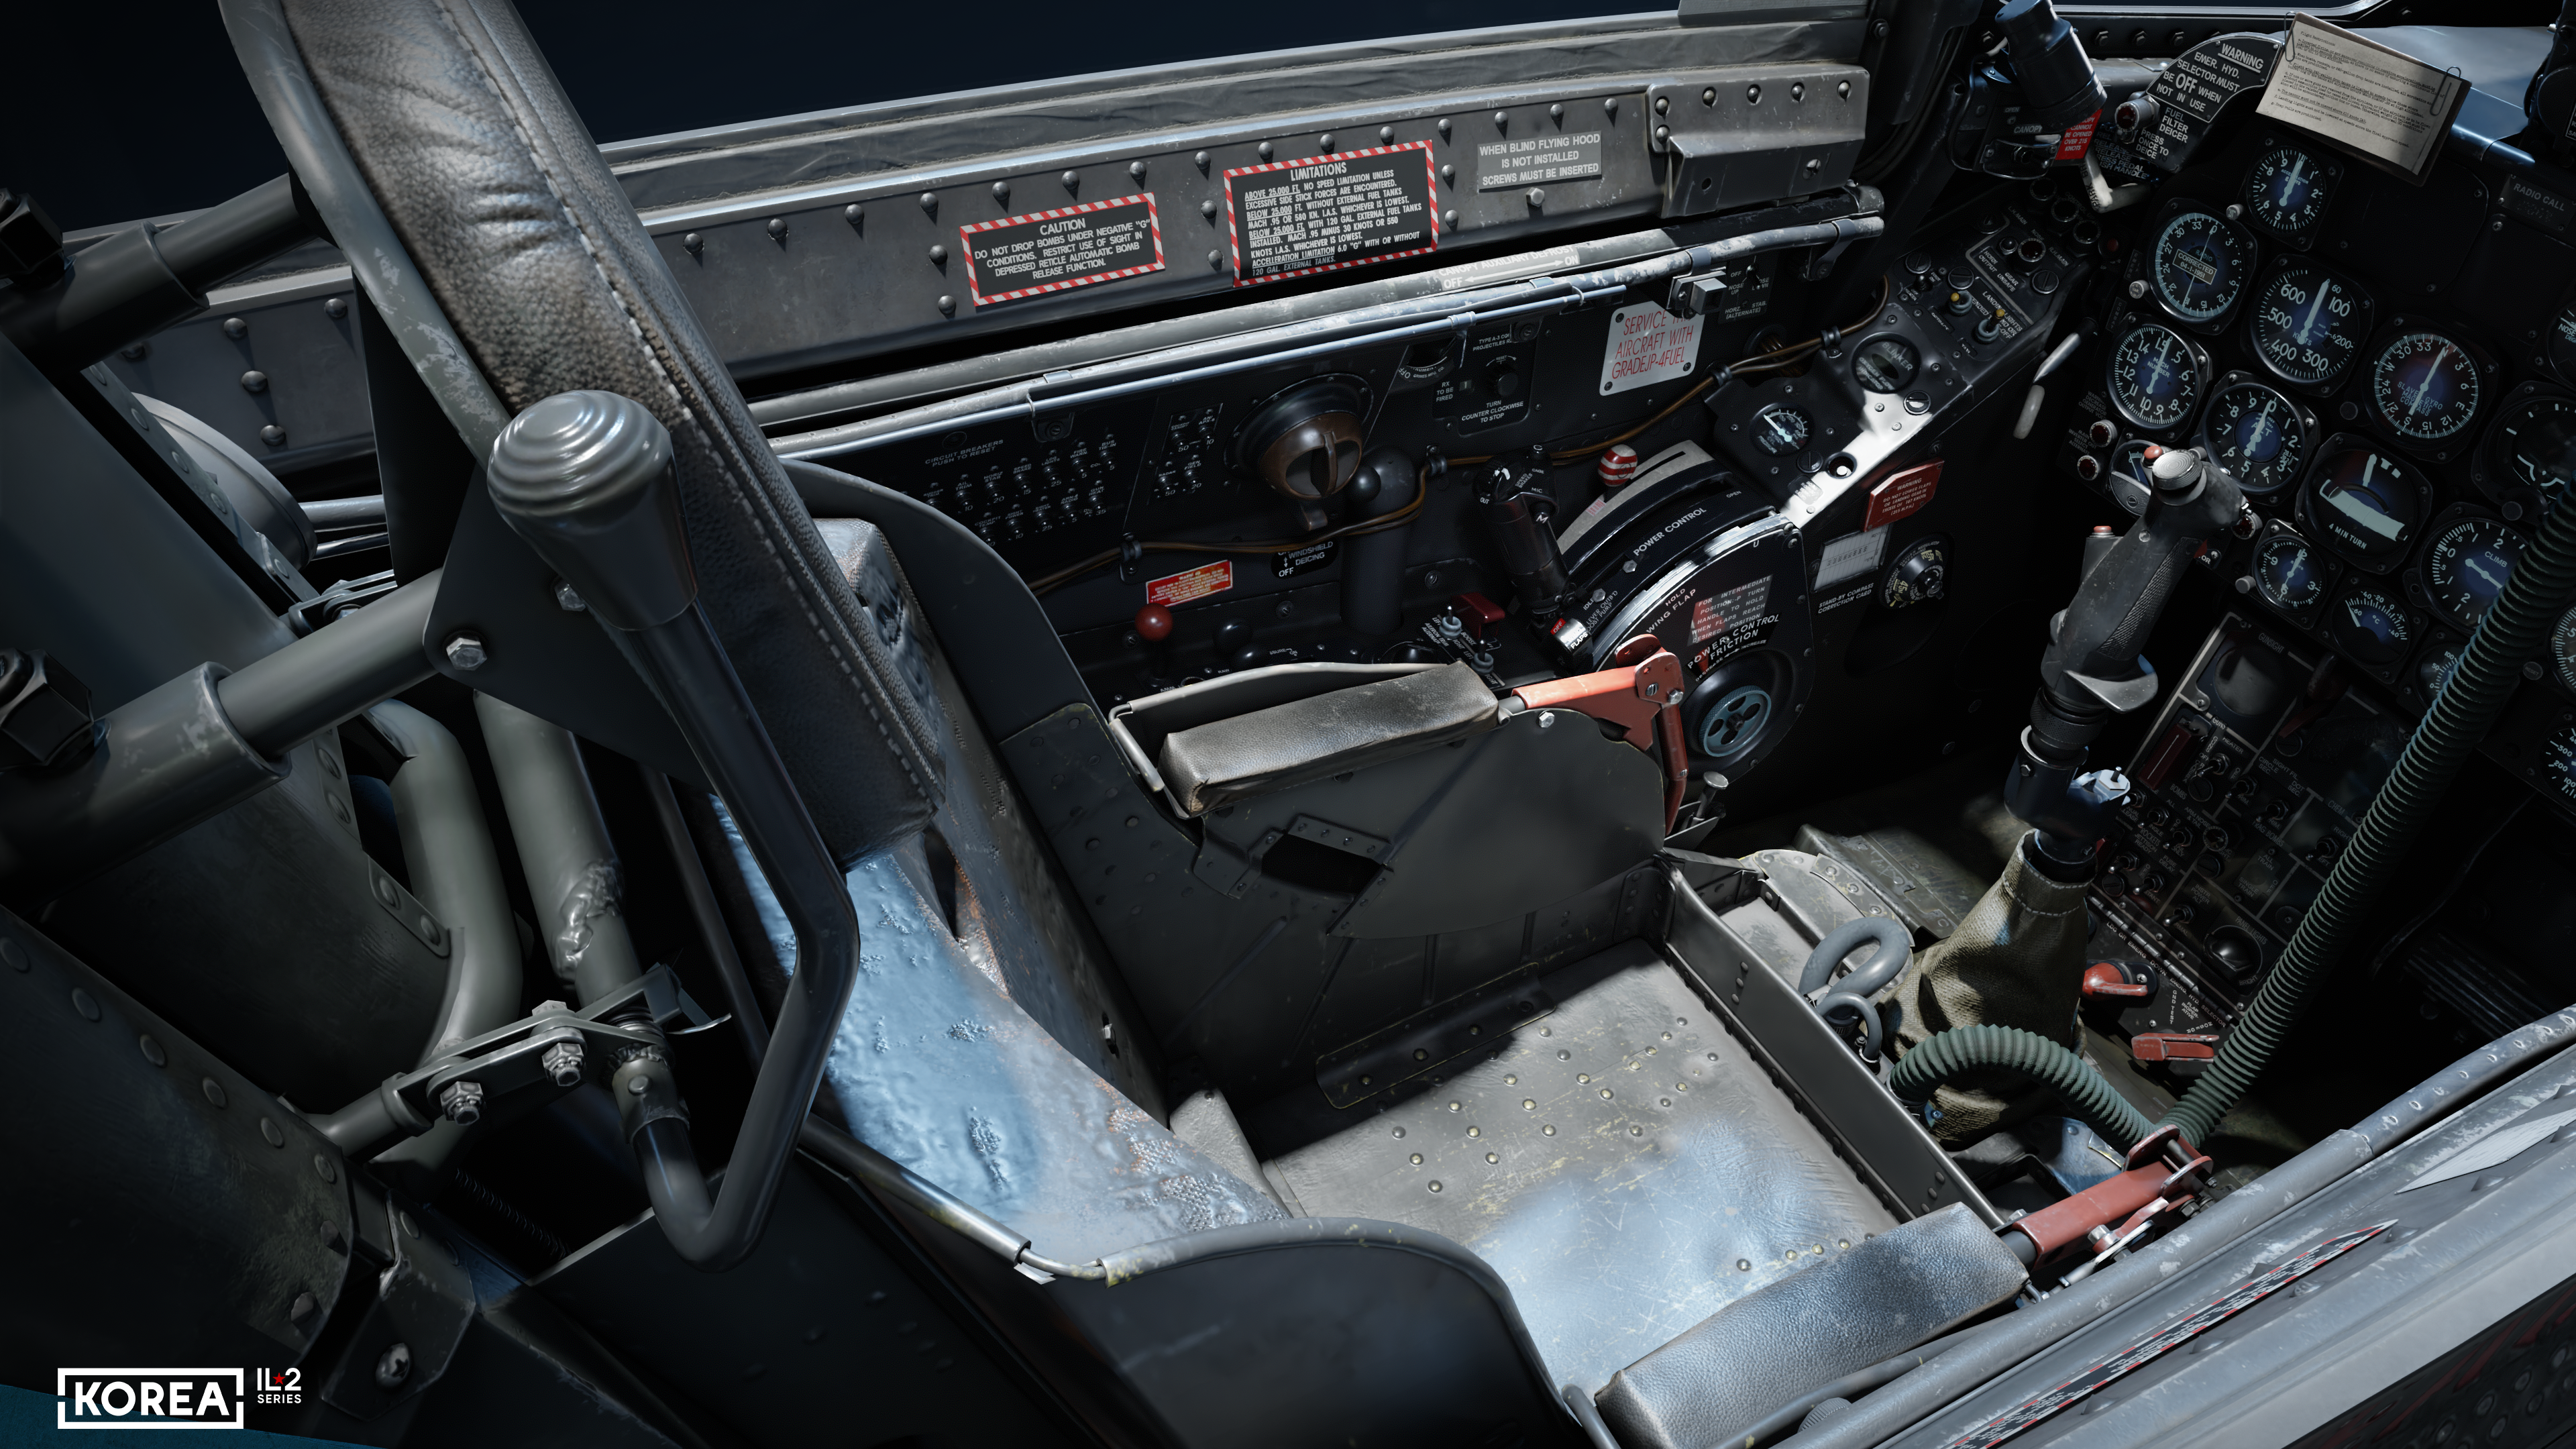
The pilot’s ejection seat has two handles. When ejecting, the pilot first pulls the left handle of the shoulder strap lock, then the right handle of the canopy release, and presses the ejection trigger located below it. On the left side of the seat, the headrest features a warning buzzer for landing gear deployment. Behind the seat, under the rear part of the canopy, is a rotating radio compass antenna in a transparent glass enclosure.
The pilot’s ejection seat has two handles. When ejecting, the pilot first pulls the left handle of the shoulder strap lock, then the right handle of the canopy release, and presses the ejection trigger located below it. On the left side of the seat, the headrest features a warning buzzer for landing gear deployment. Behind the seat, under the rear part of the canopy, is a rotating radio compass antenna in a transparent glass enclosure.
The aircraft control stick and throttle have numerous controls on them. The control stick has machine gun triggers, a button for dropping bombs and launching rockets, trim control, a radio rangefinder button on the left, and a button for activating the nose landing gear control.
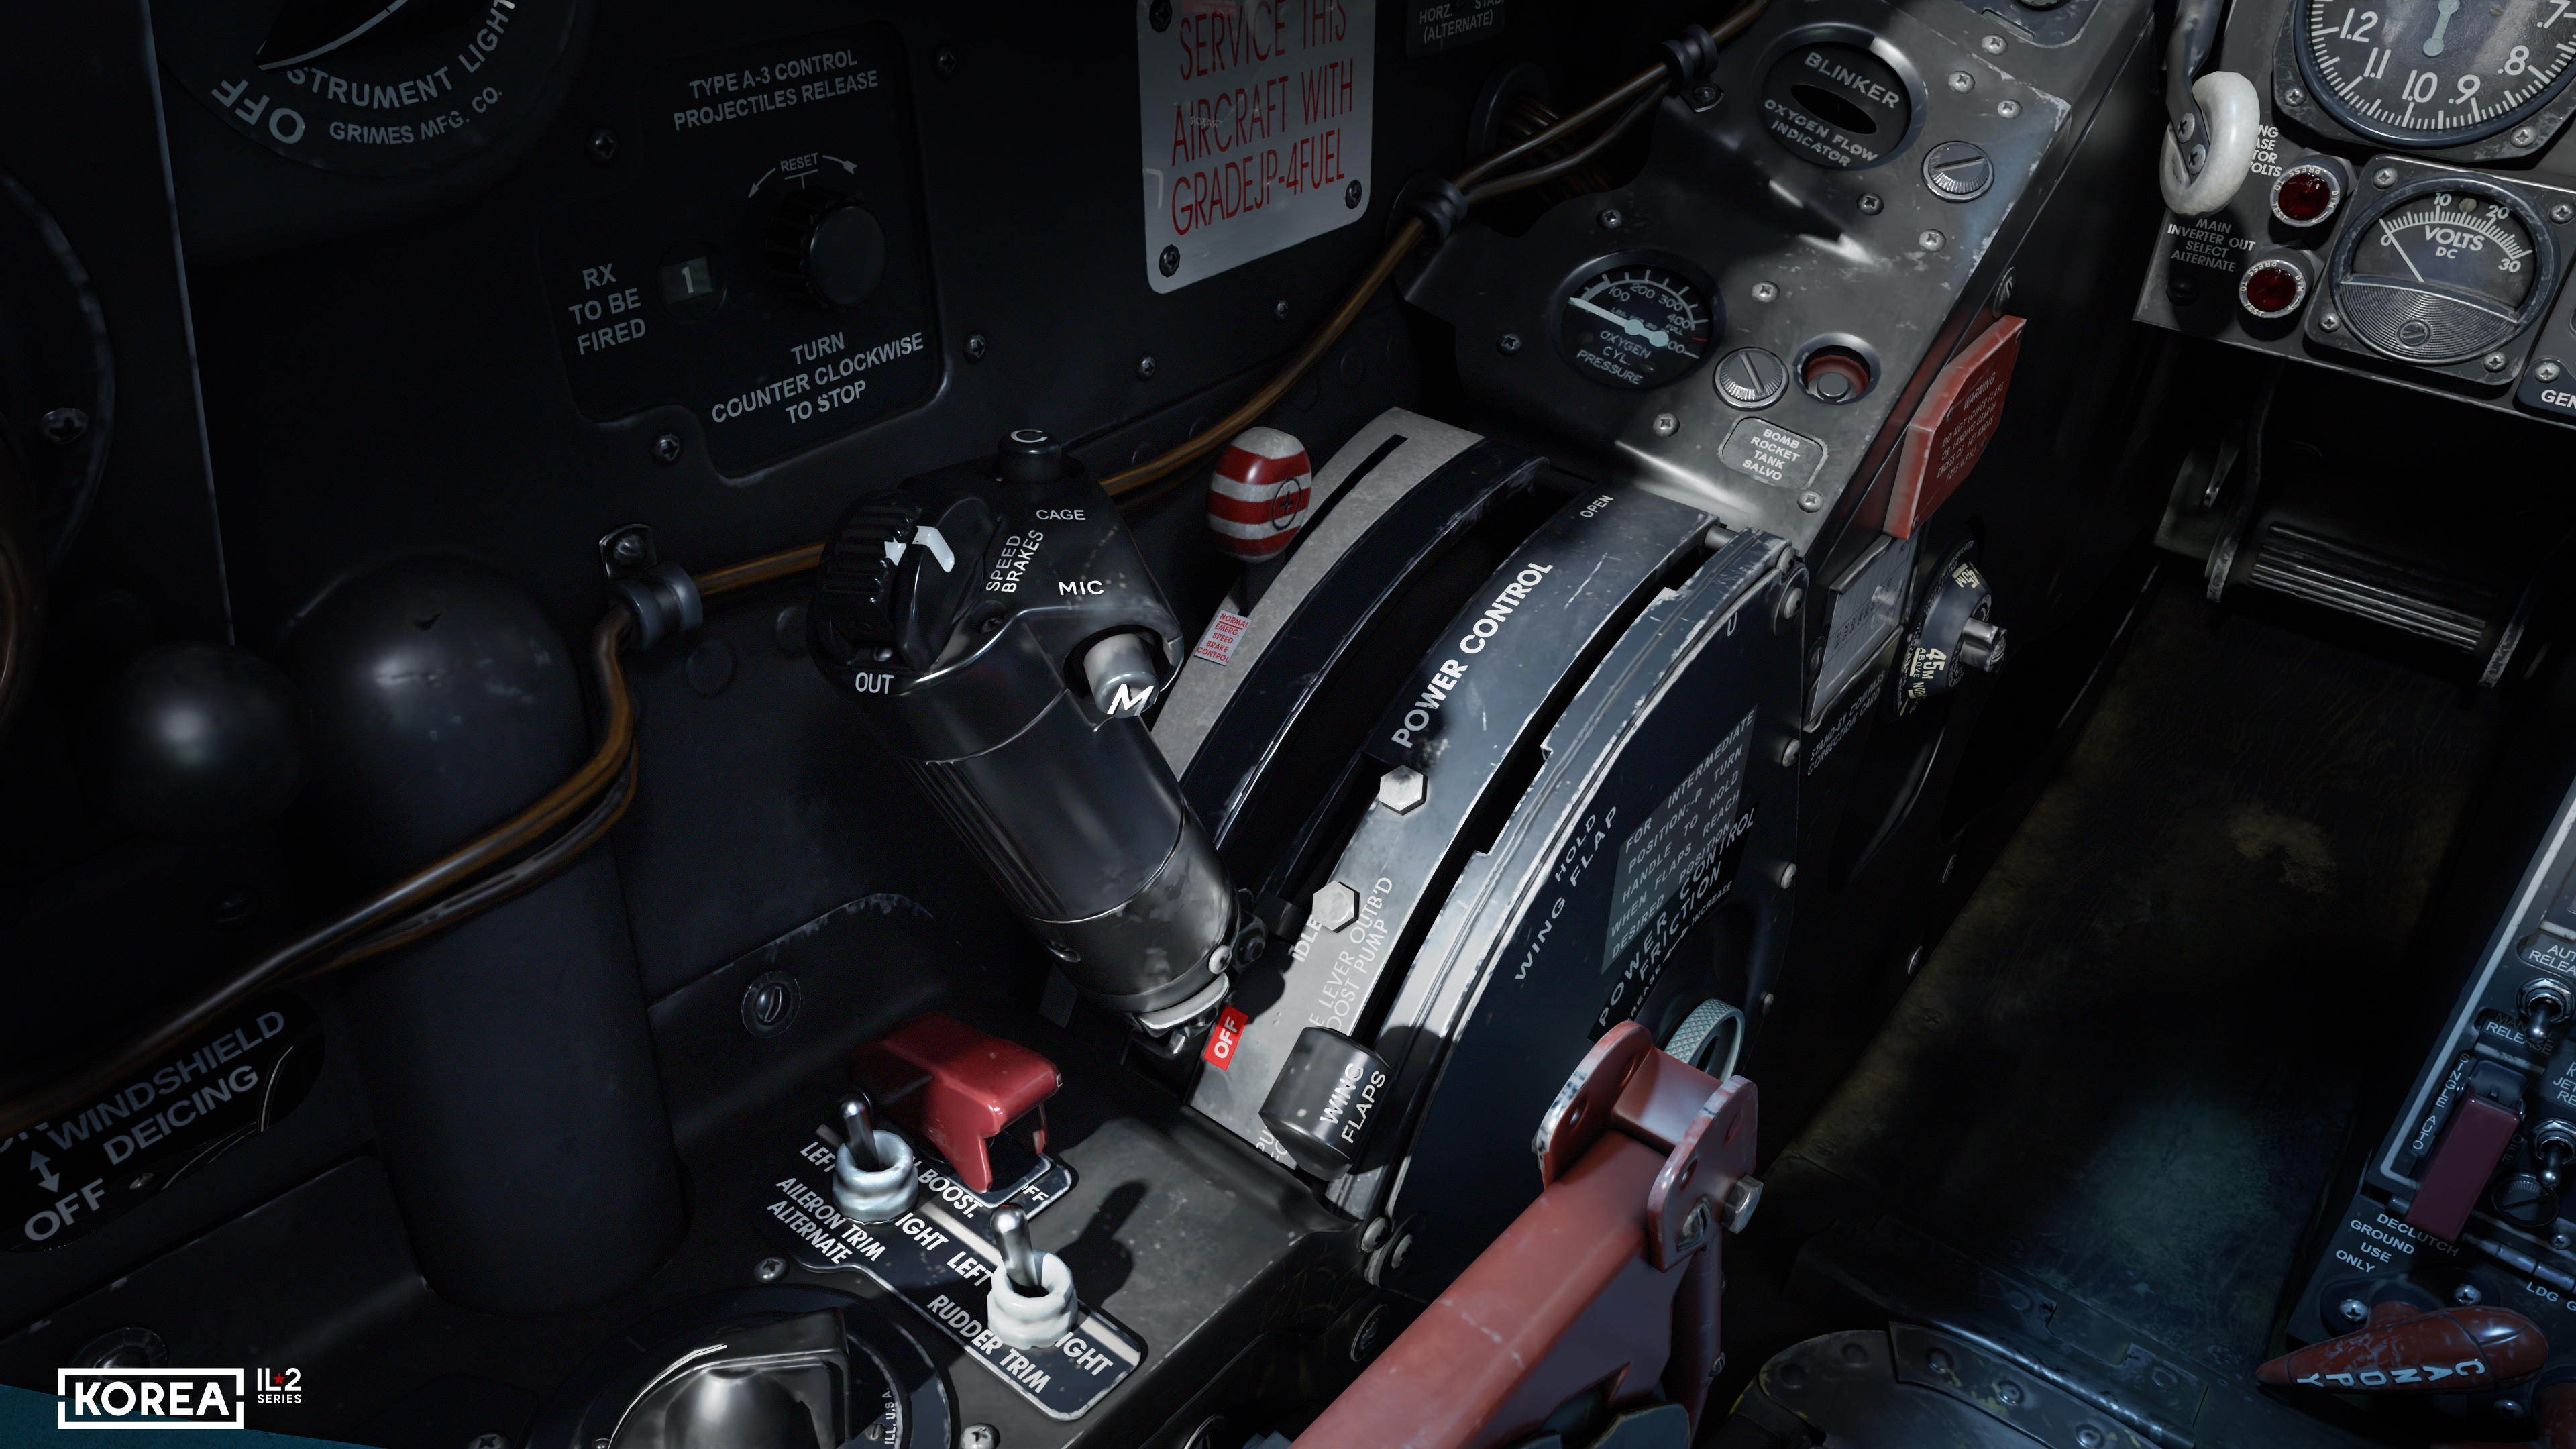
The throttle has a radio talk button, a gunsight lock button, and an air brake control switch.
Each cockpit has its own unique history, especially at a time when jet aviation had not yet transitioned to missiles and pilots were engaged in maneuvering gun battles, literally at the limits of human capabilities. The more you study such cockpits, the more you immerse yourself in the details, the more interesting things you find. The Sabre cockpit is not the last one that we will show you in all its details.